Adding a Flow
A flow must be constructed for each one-way data flow between a payer and a network. Each flow is triggered by the event where MacroHealth receives a file from a 3rd party.
Note
If you have just created a Connection and are already on the Connection's page, go to step 5.
Click the Connect tab.

Select the Customer for which you are adding a flow.

From the Integrations list or the left side panel, click the Integration for which you are adding a flow.
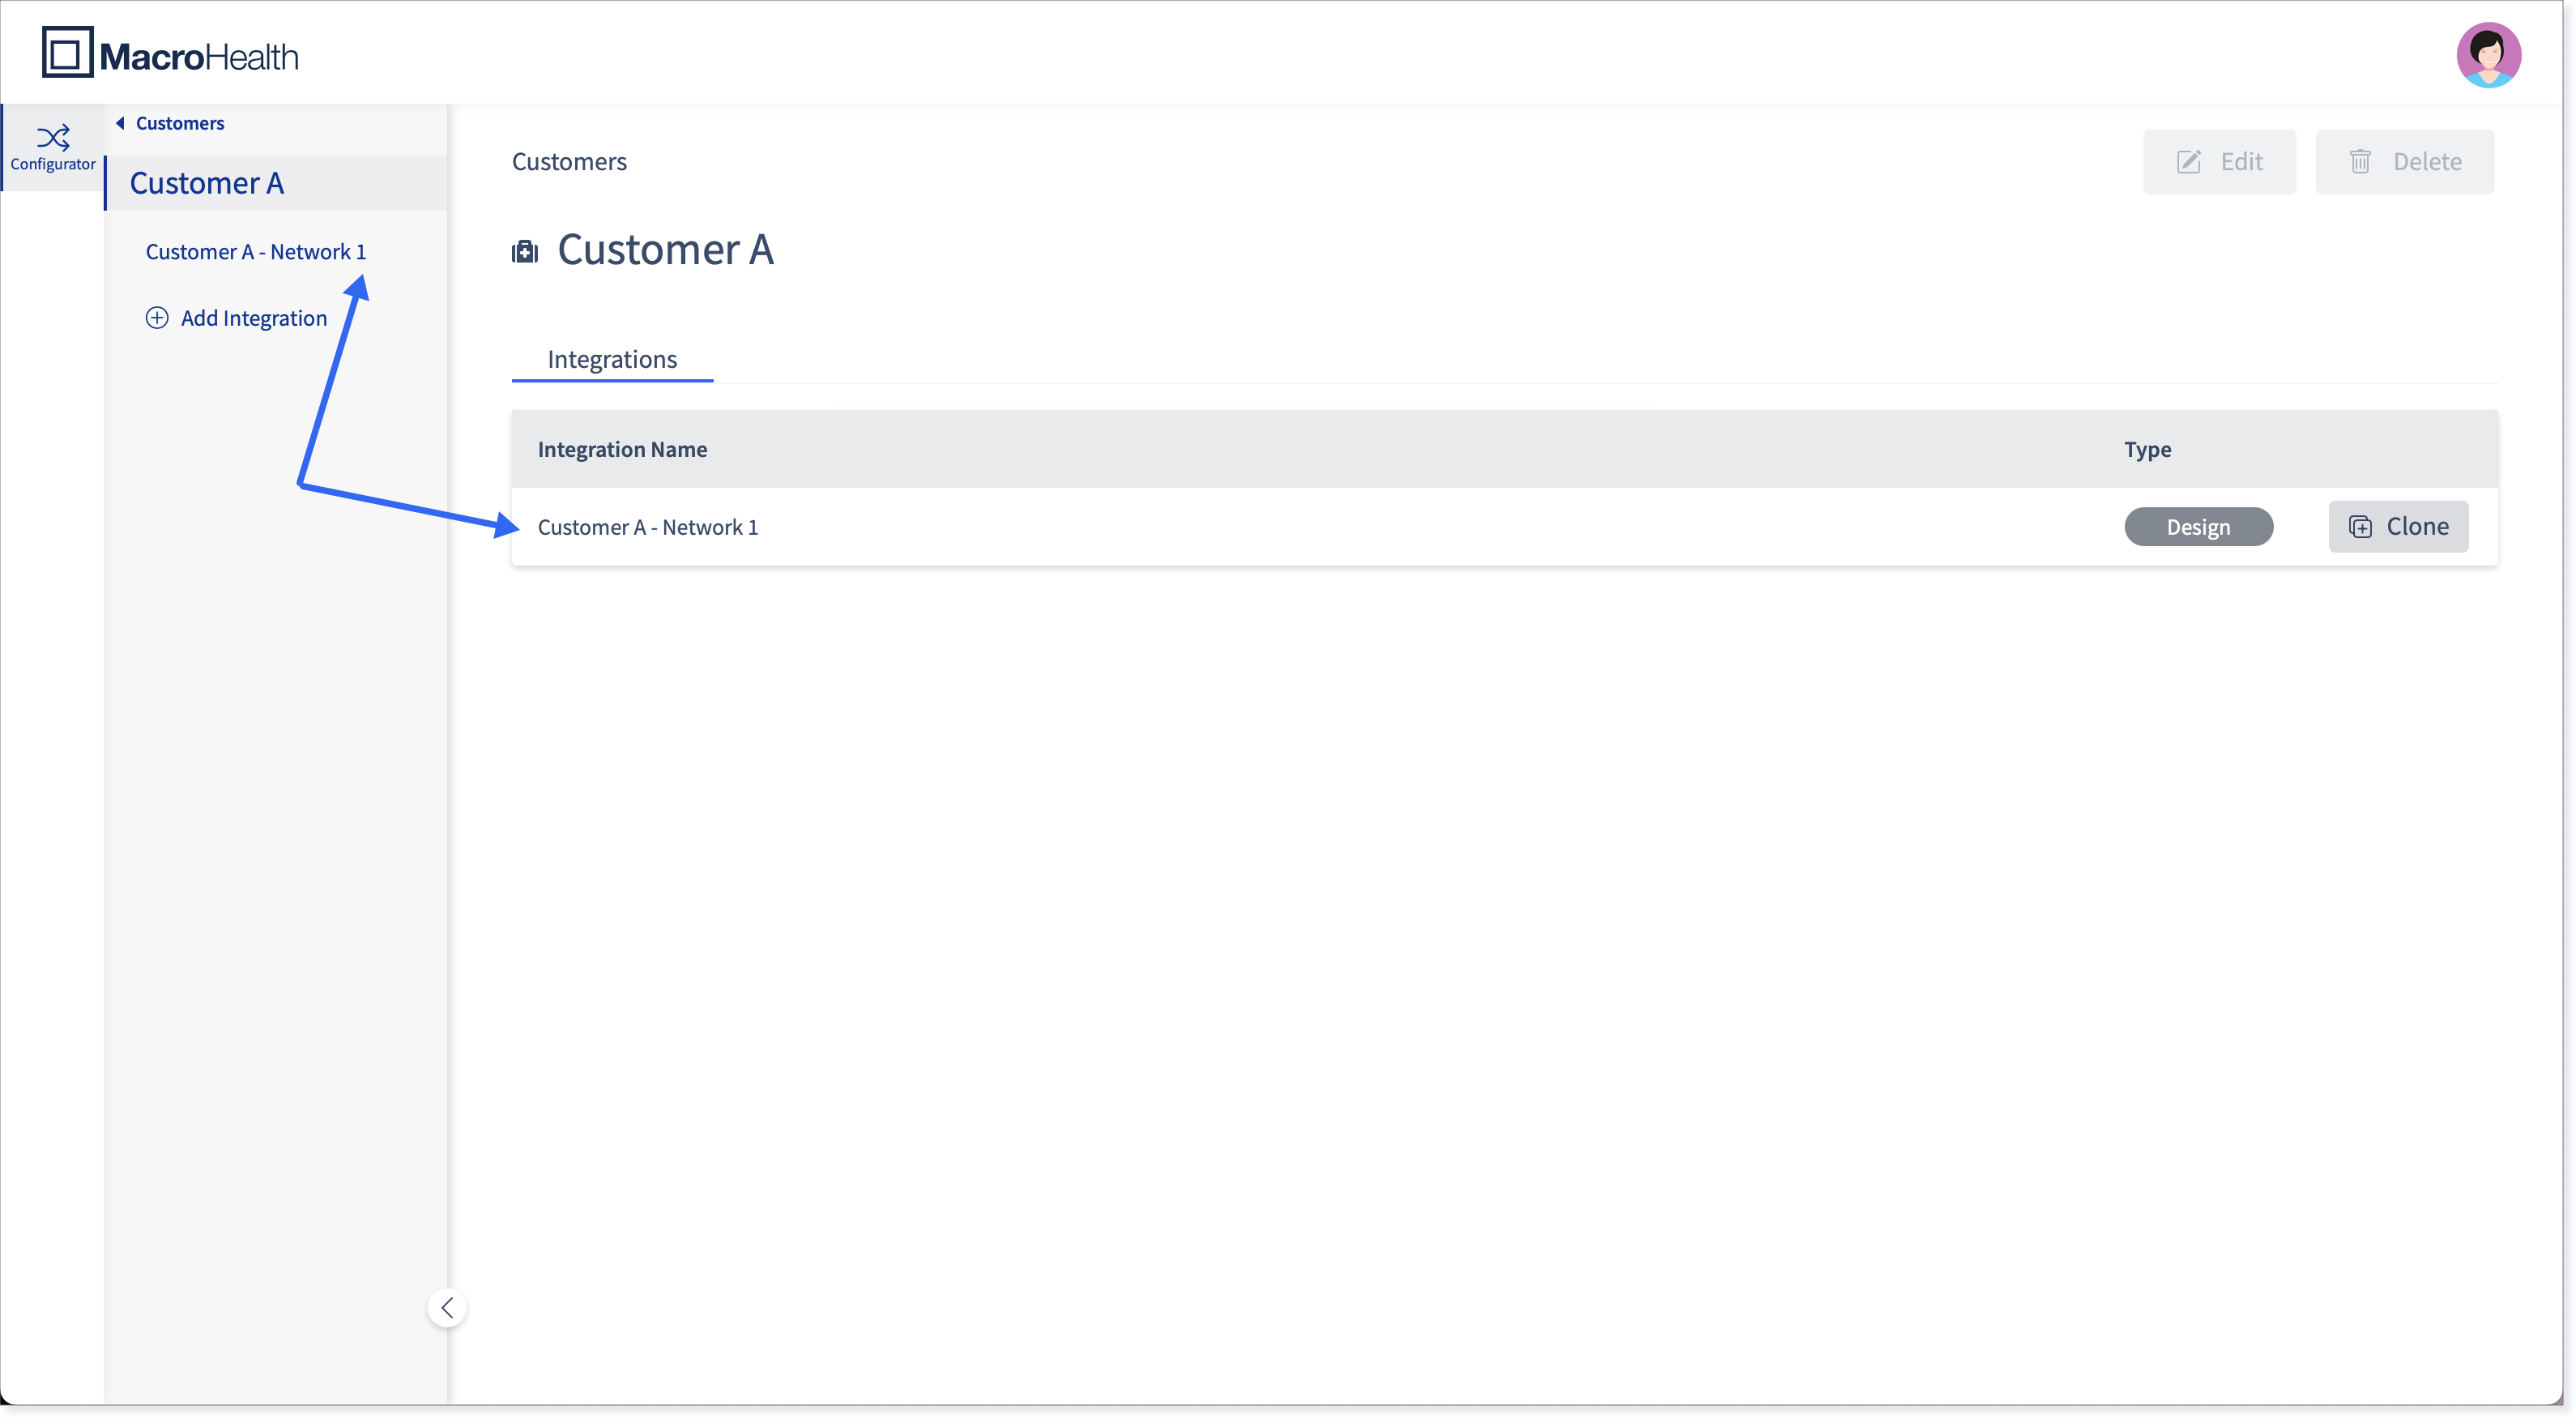
From the Connections list or the left side panel, click the Connection for which you are adding a flow.

Click Add Flow.

Enter a Flow Name. The name should be representative of the the type of file that is being processed and the operation that is occurring, for example 837i Repricing Flow or 834 Enrollment Flow.
Click Next.

A message will appear for a short period of time letting you know that the flow is ready to be configured. You will land in the Flow Configurator Page.


To add another Flow, click Add Flow.

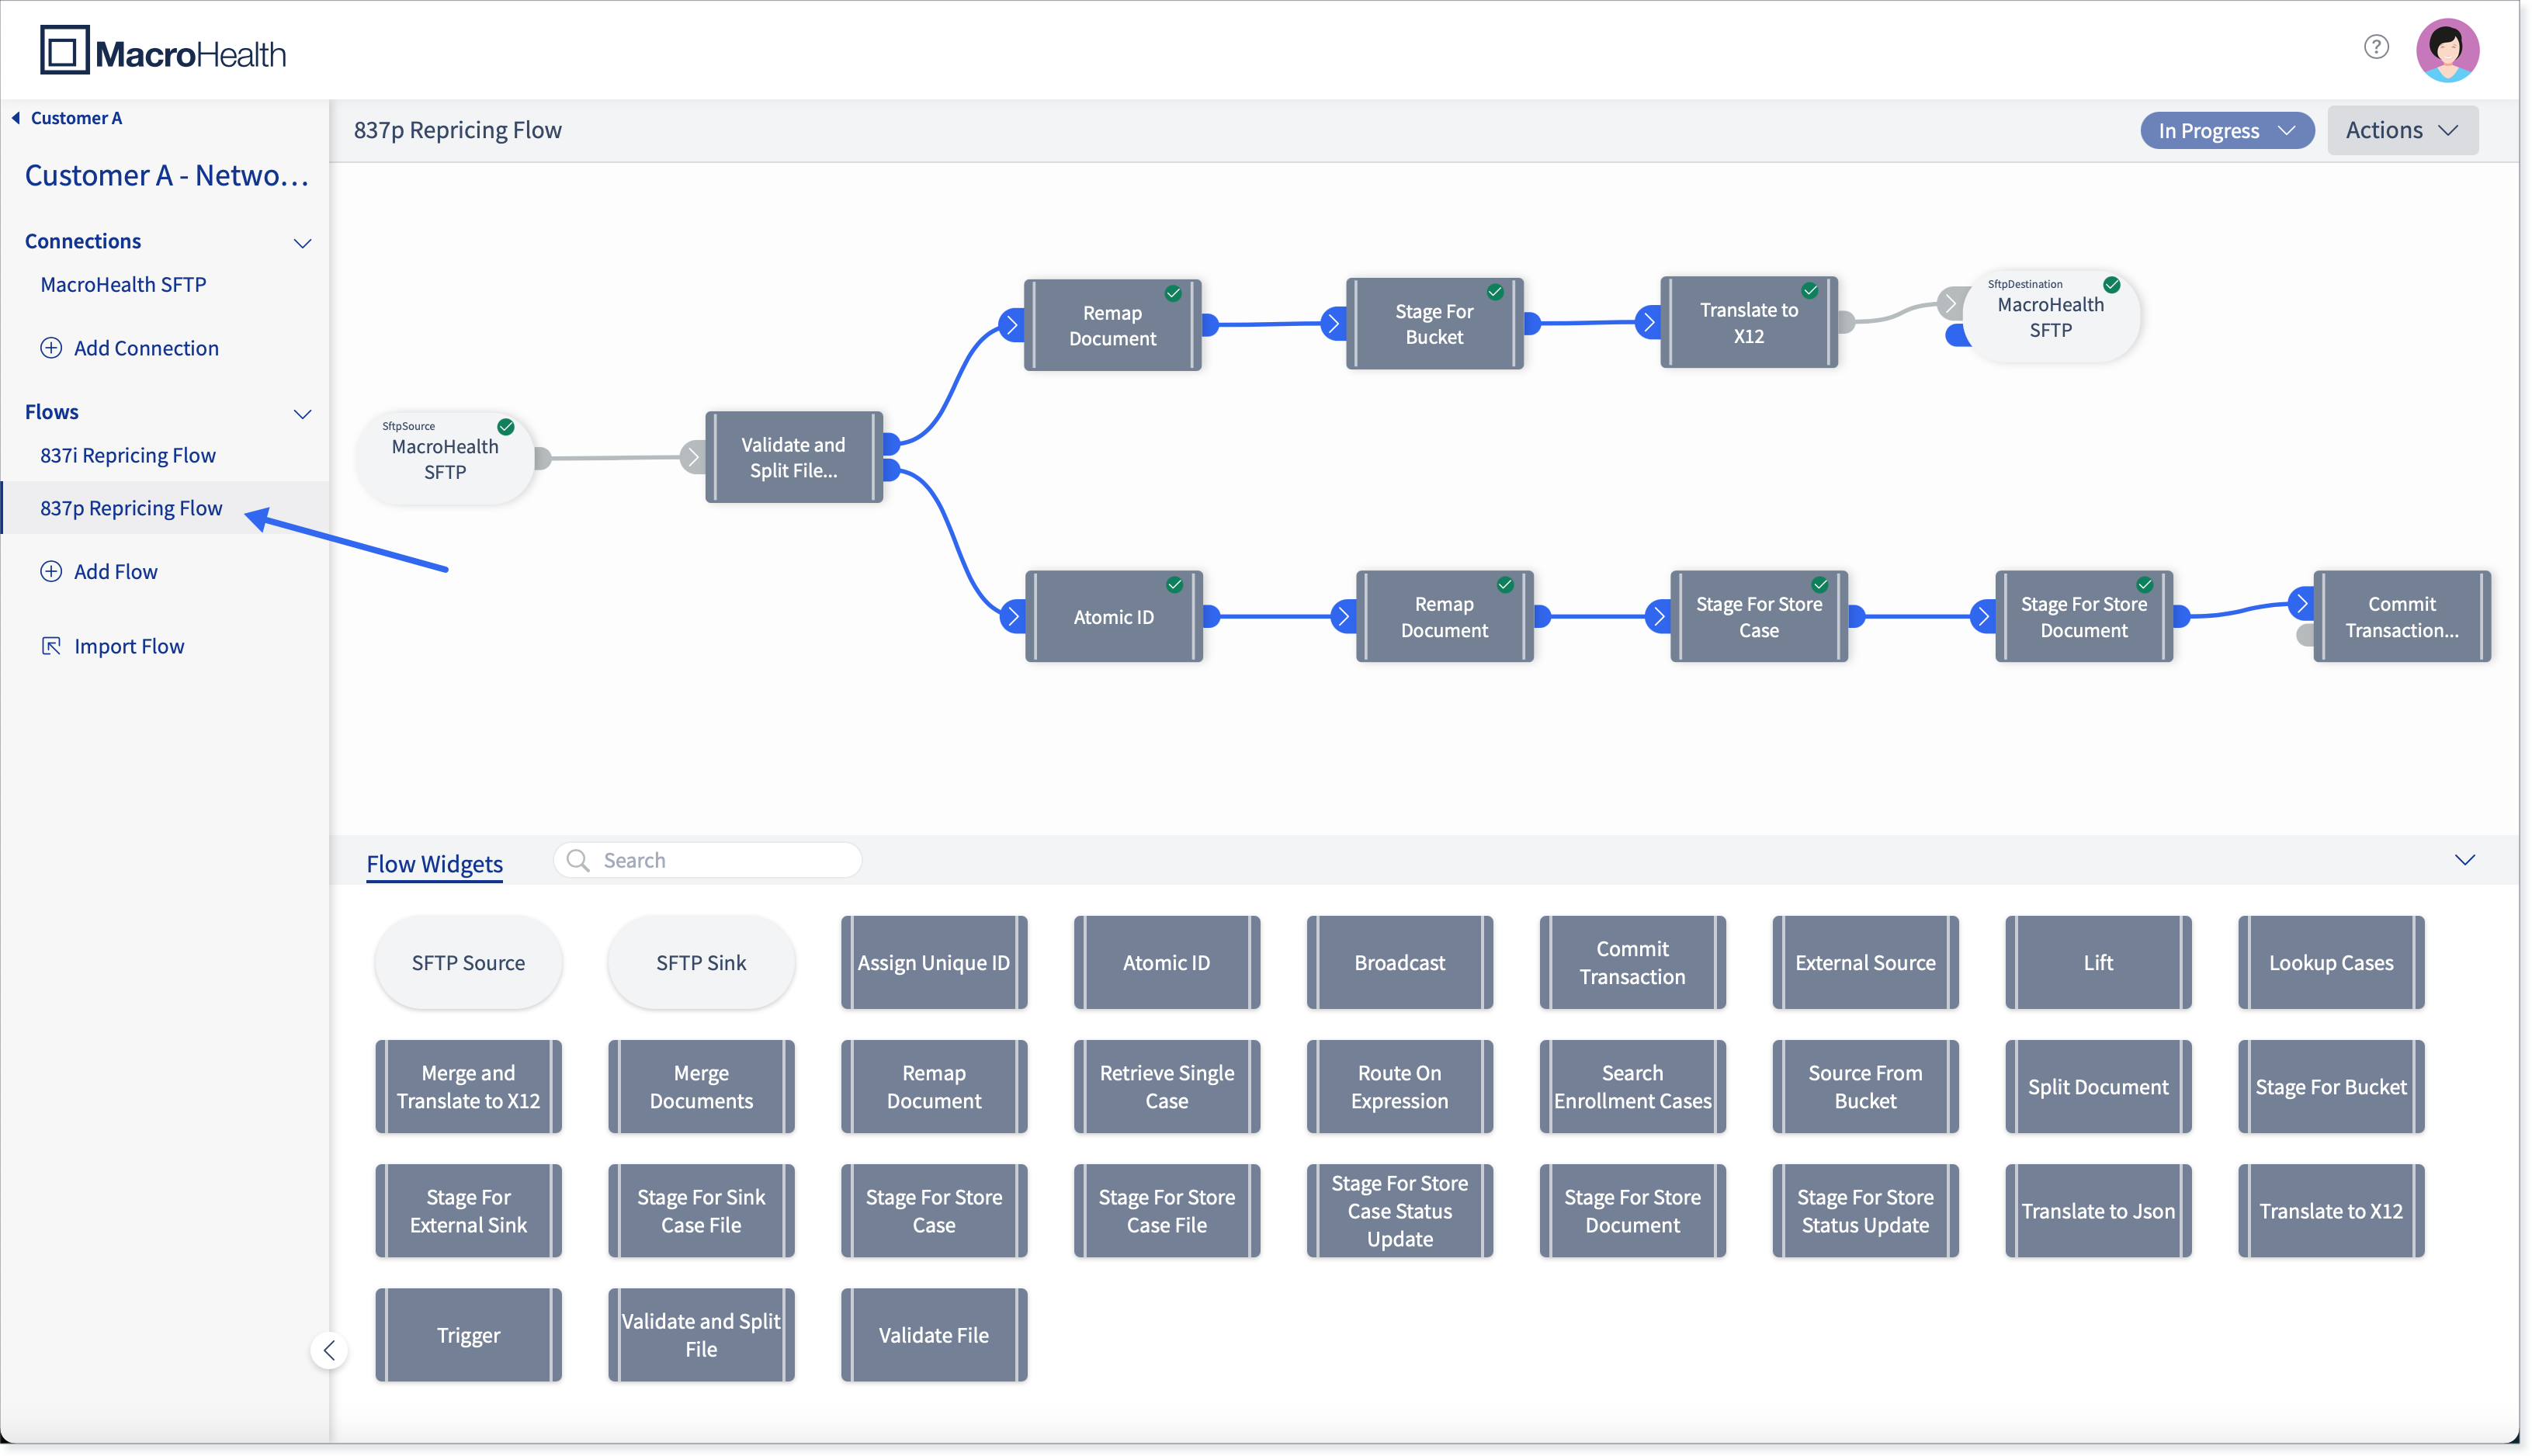
Building a Flow
Depending on the type of flow you are building, refer to Section : “Building Claims Flows” or Section : “Enrollment FlowsPlatform Flow” to understand what widgets your flow must include and how to configure them.
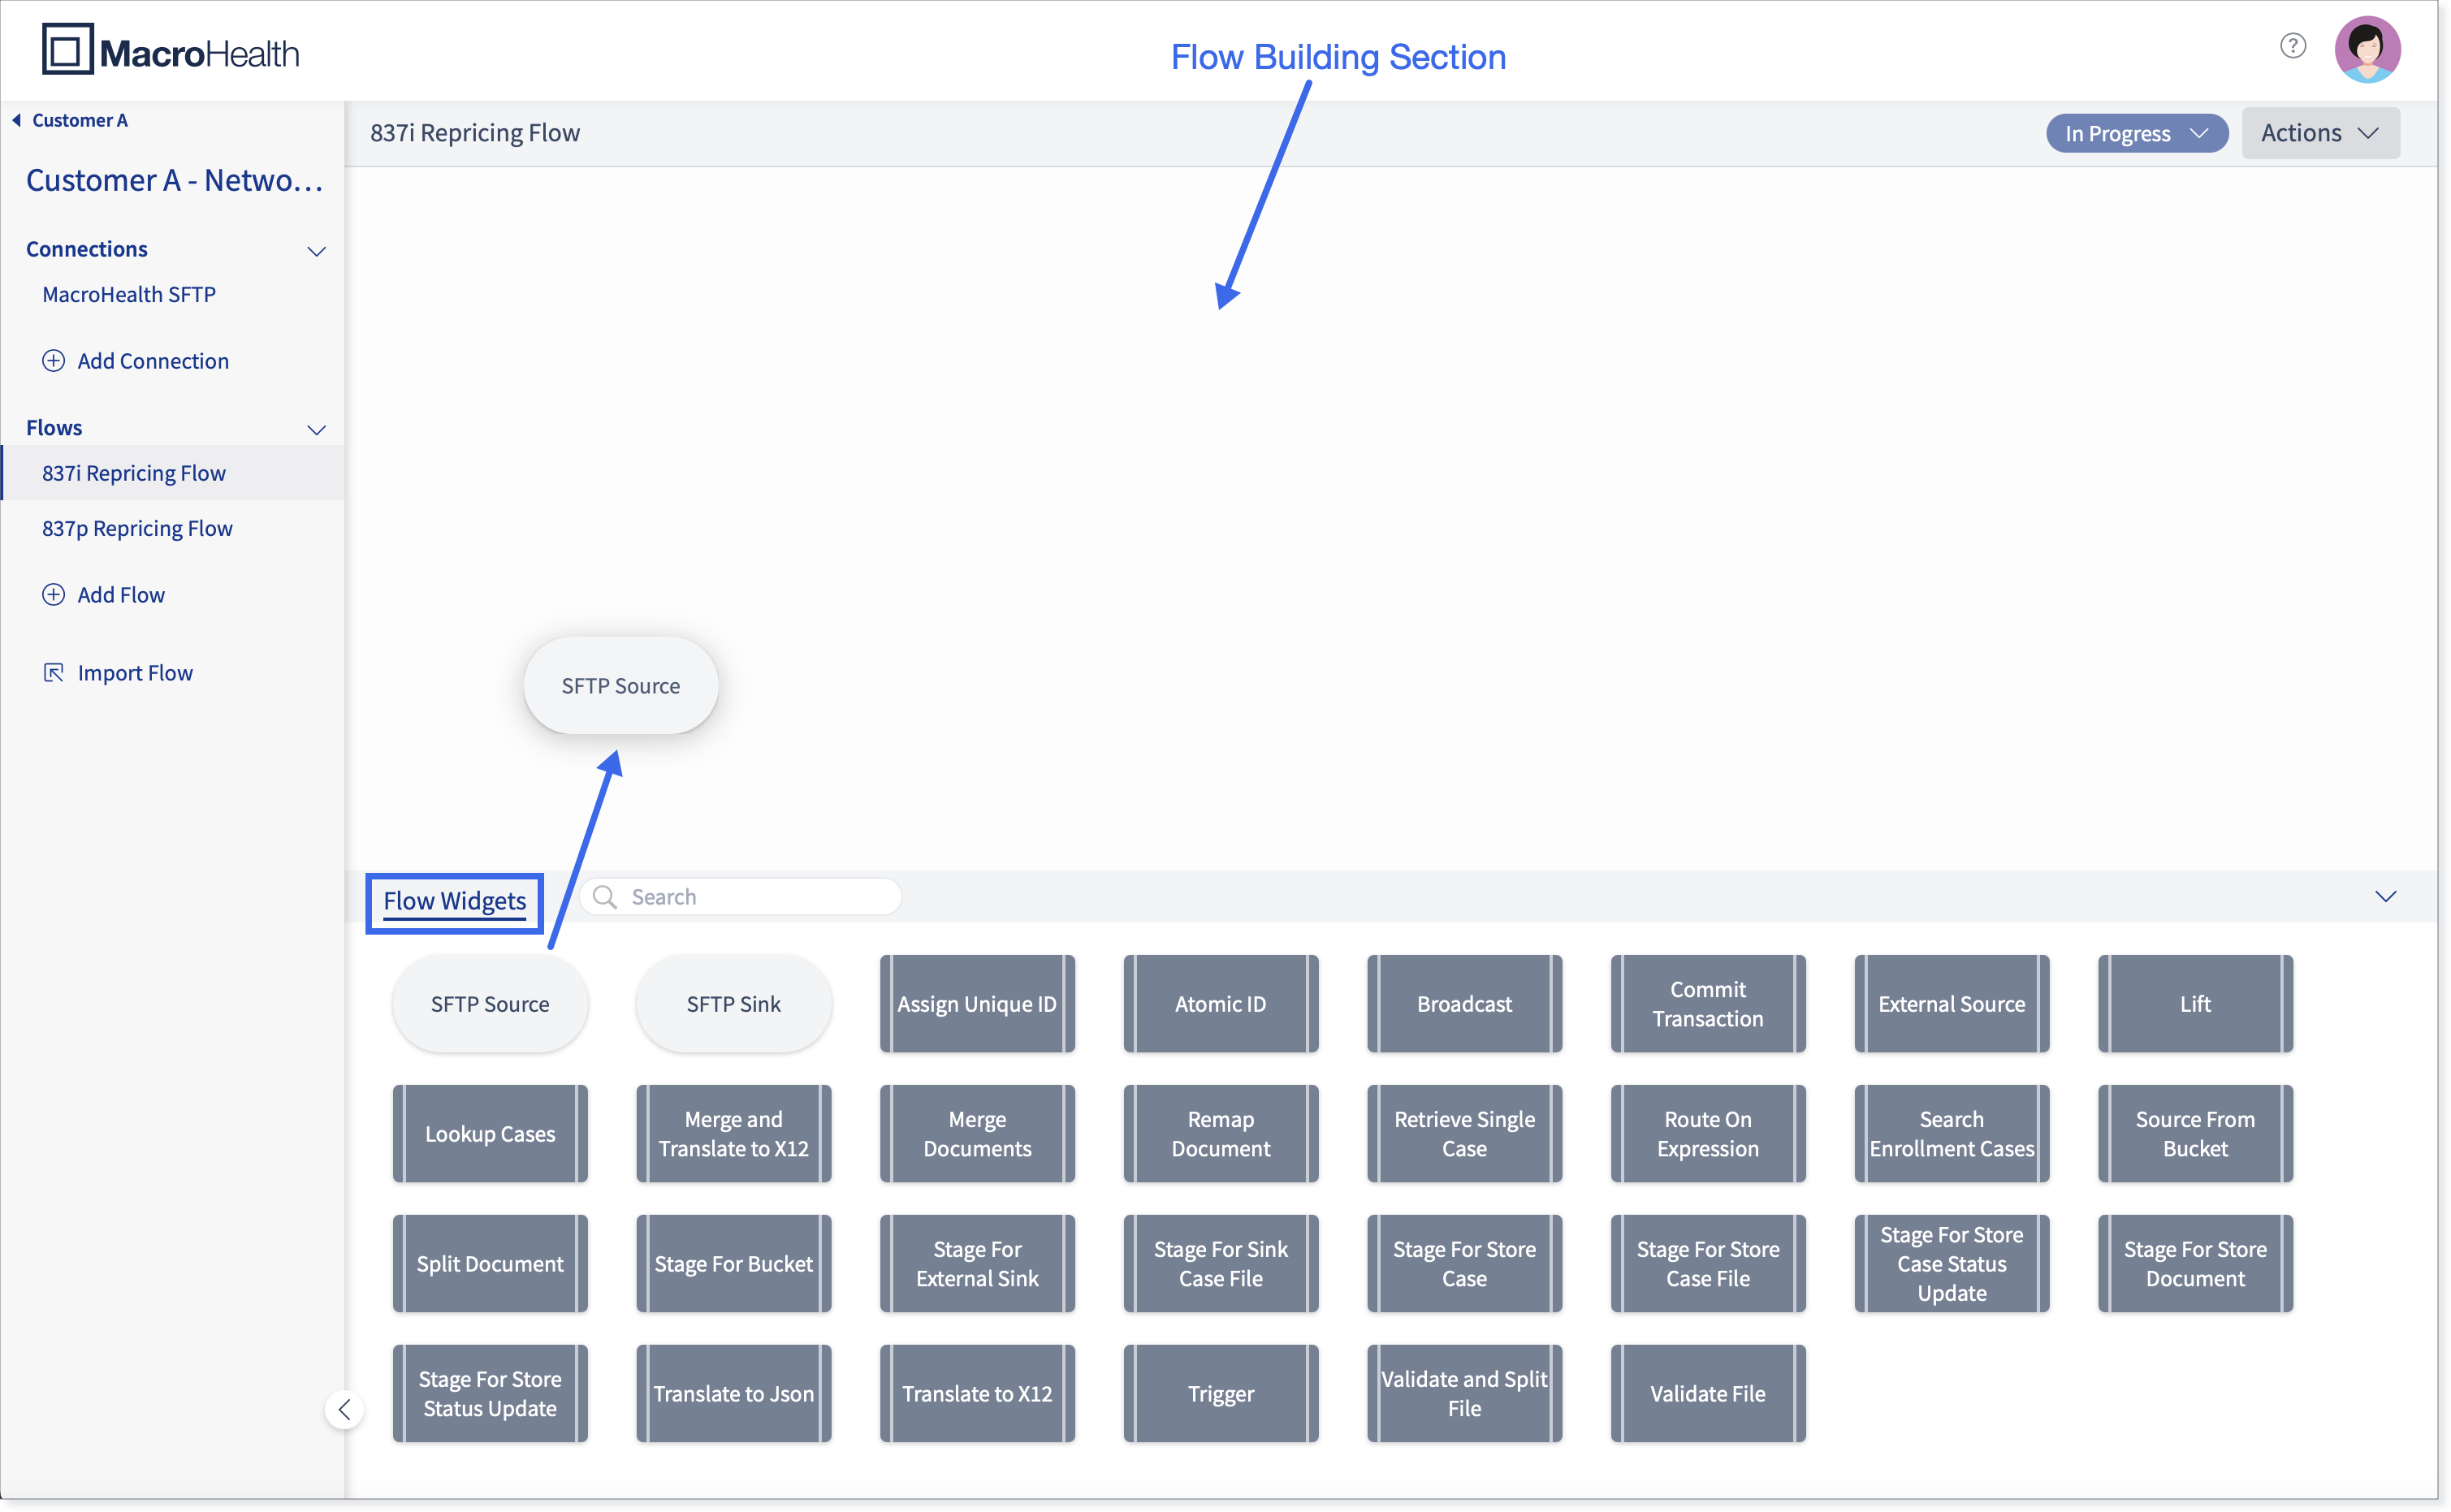
Slide a first widget from the Flow Widgets section at the bottom to the Flow Building section at the top.
Tip
Use the Search field to find a widget more quickly. The search is incremental, allowing you to see only the choices that correspond closest to what you are looking for.

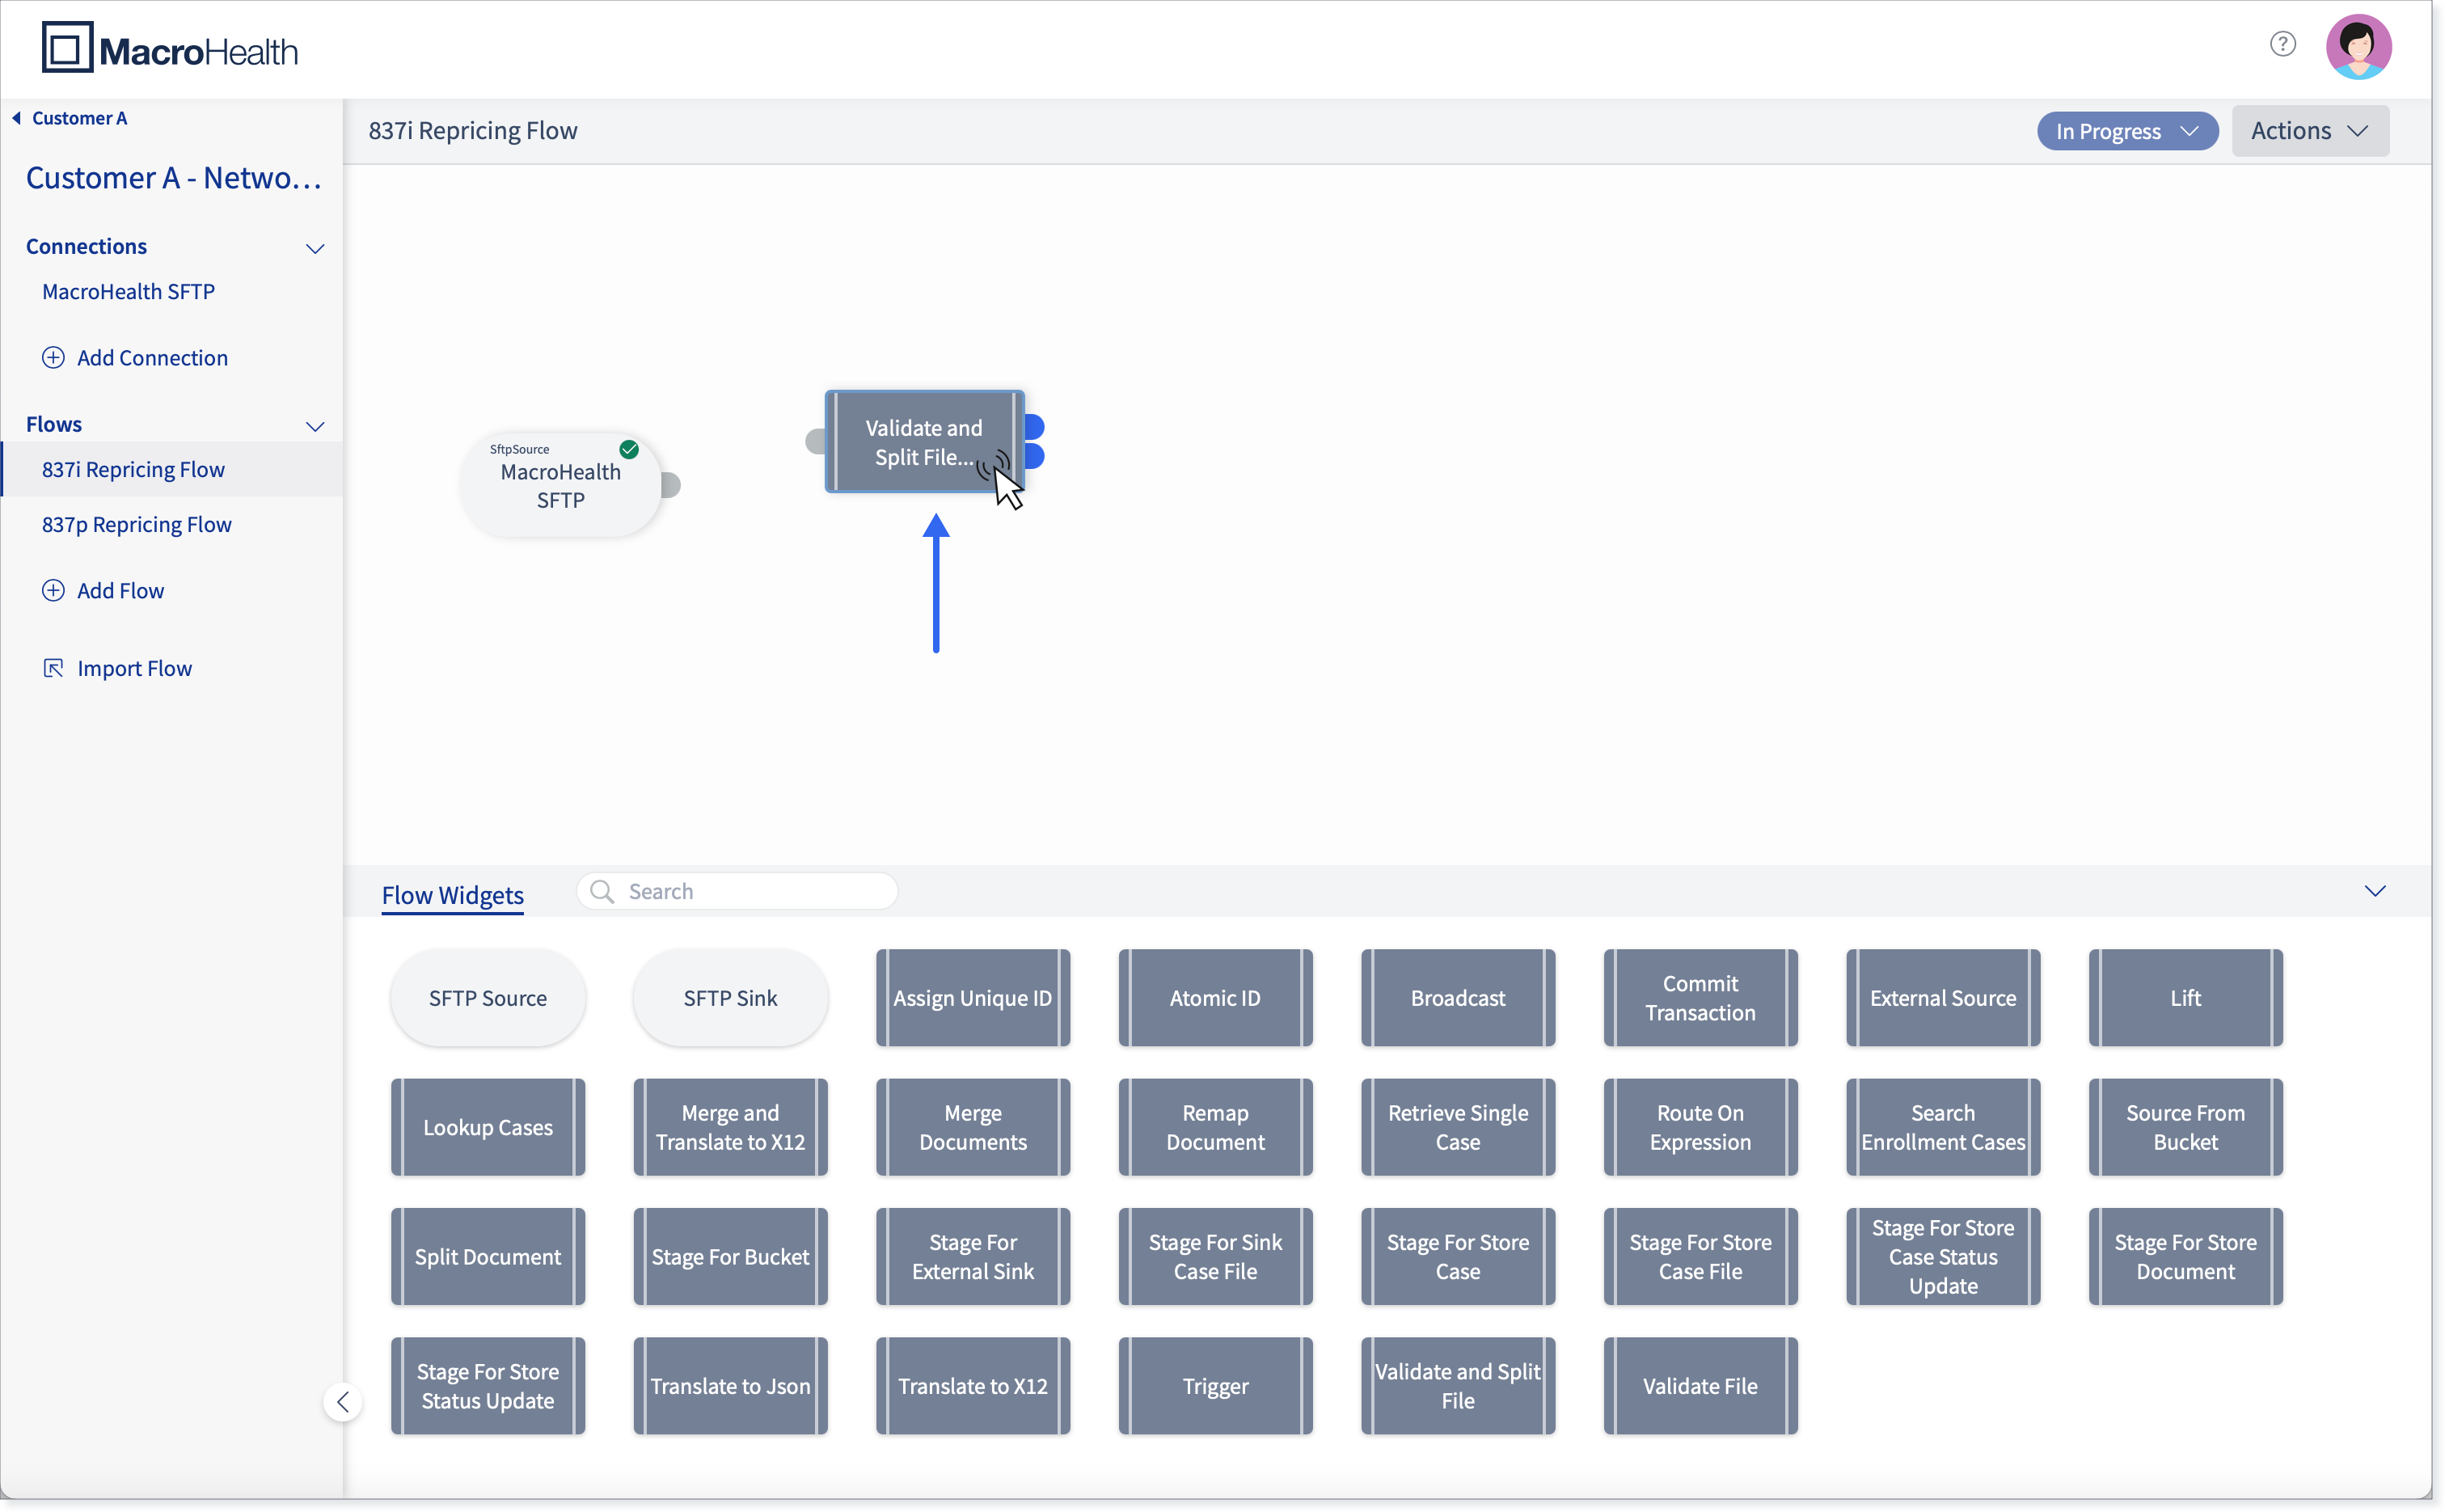
Click on the widget to configure it.

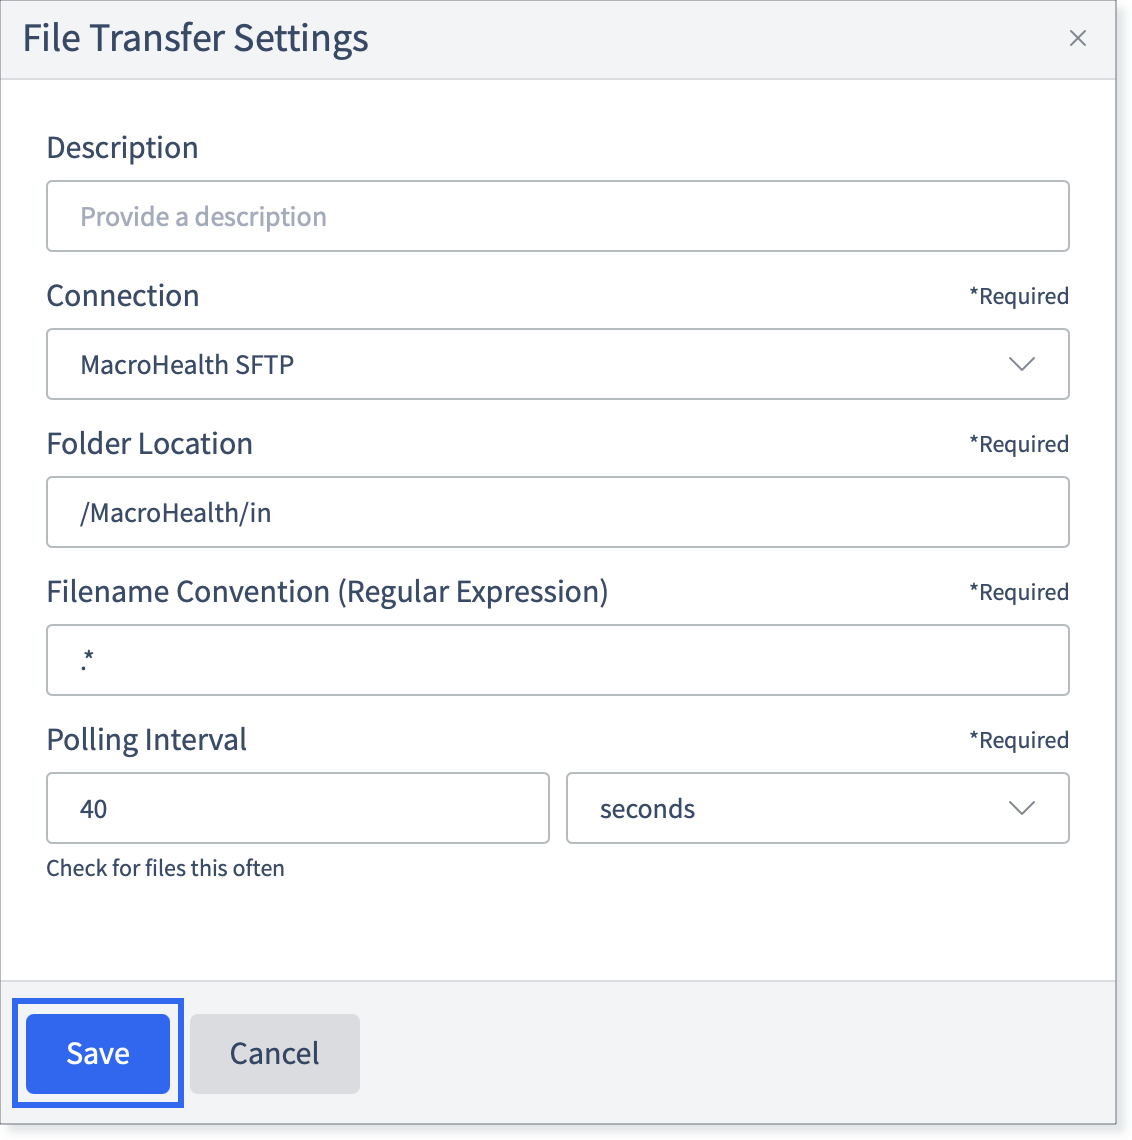
Fill in the configuration fields. Fields marked as *Required must be filled in. Others are optional. To know how to fill in the widget configuration windows, see Section : “Shovel Operations”.

Once all fields are filled as required, click Save.
Note
The Save button will only be available once all the required fields are filled in correctly.
Once the widget is configured correctly, a green check will appear on the upper right corner of the widget.

Slide a second widget next to the first one.

Tip
If you slide the wrong widget by mistake, right click on the widget itself and select delete.

Tip
A widget can be moved by clicking on the widget while holding down the left side button of the mouse.
Click on the widget to configure the Shovel Operation. Fill in the required fields and click Save.
Connect both widgets by clicking on the output port of the first widget, holding the left side button of the mouse and letting go on the input port of the second widget.


Tip
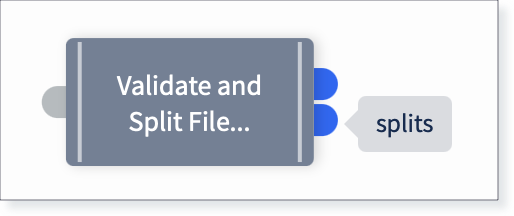
When a widget has more than one port, hovering over each of the ports will let you know the function of each.

Continue adding widgets, configuring them, and connecting the ports until all the flow is completed.

Flow Building Layout Tools
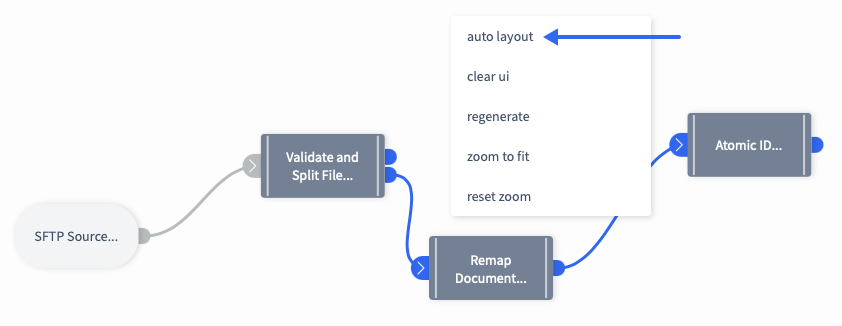
Right clicking in the Flow Building section will give you access to the Layout Tools.
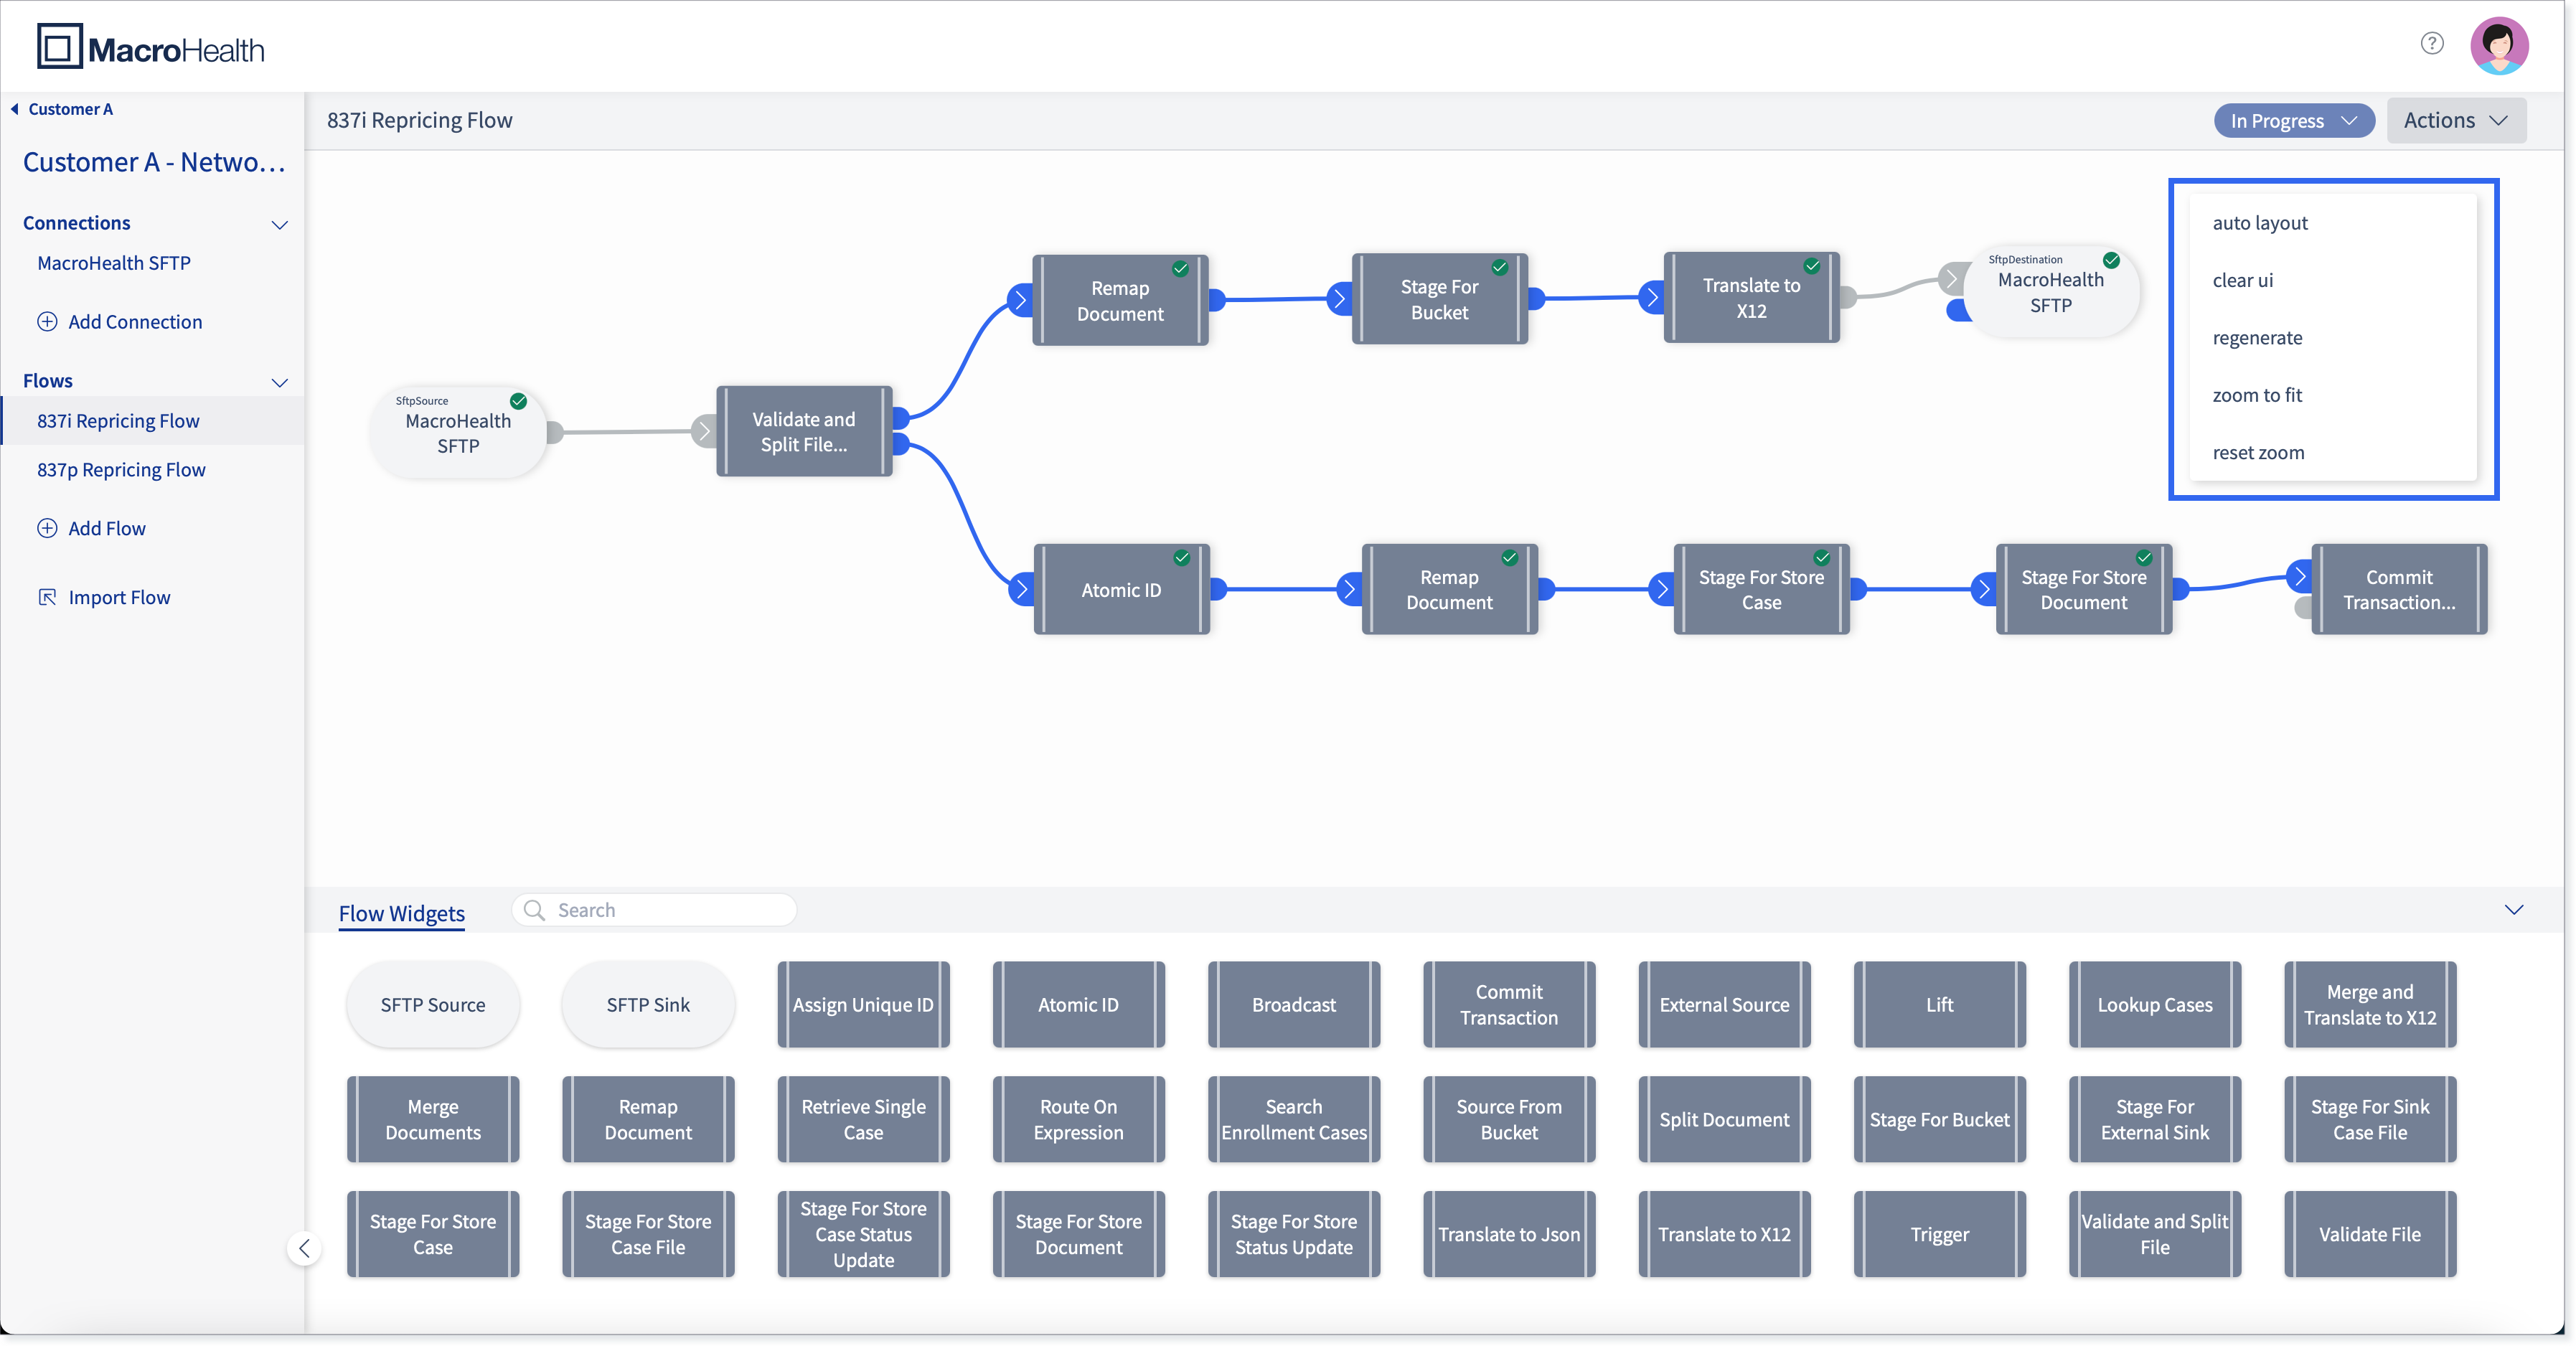
Auto Layout
Clicking auto layout will align the widgets in an aesthetic order.

Clear UI
Clicking clear ui will remove the flow that is the Flow Building section, as well as its configuration.


Regenerate
Clicking regenerate will bring back the flow that was previously in the Flow Building section, with its configuration as well.


Note
The Regenerate function will only work if the widgets have been configured previously.
Zoom to Fit
Clicking zoom to fit will centre the flow in the middle of the Flow Building section and allow you to view all the flow.


Reset Zoom
Clicking reset zoom will return the flow to its original zoom view.
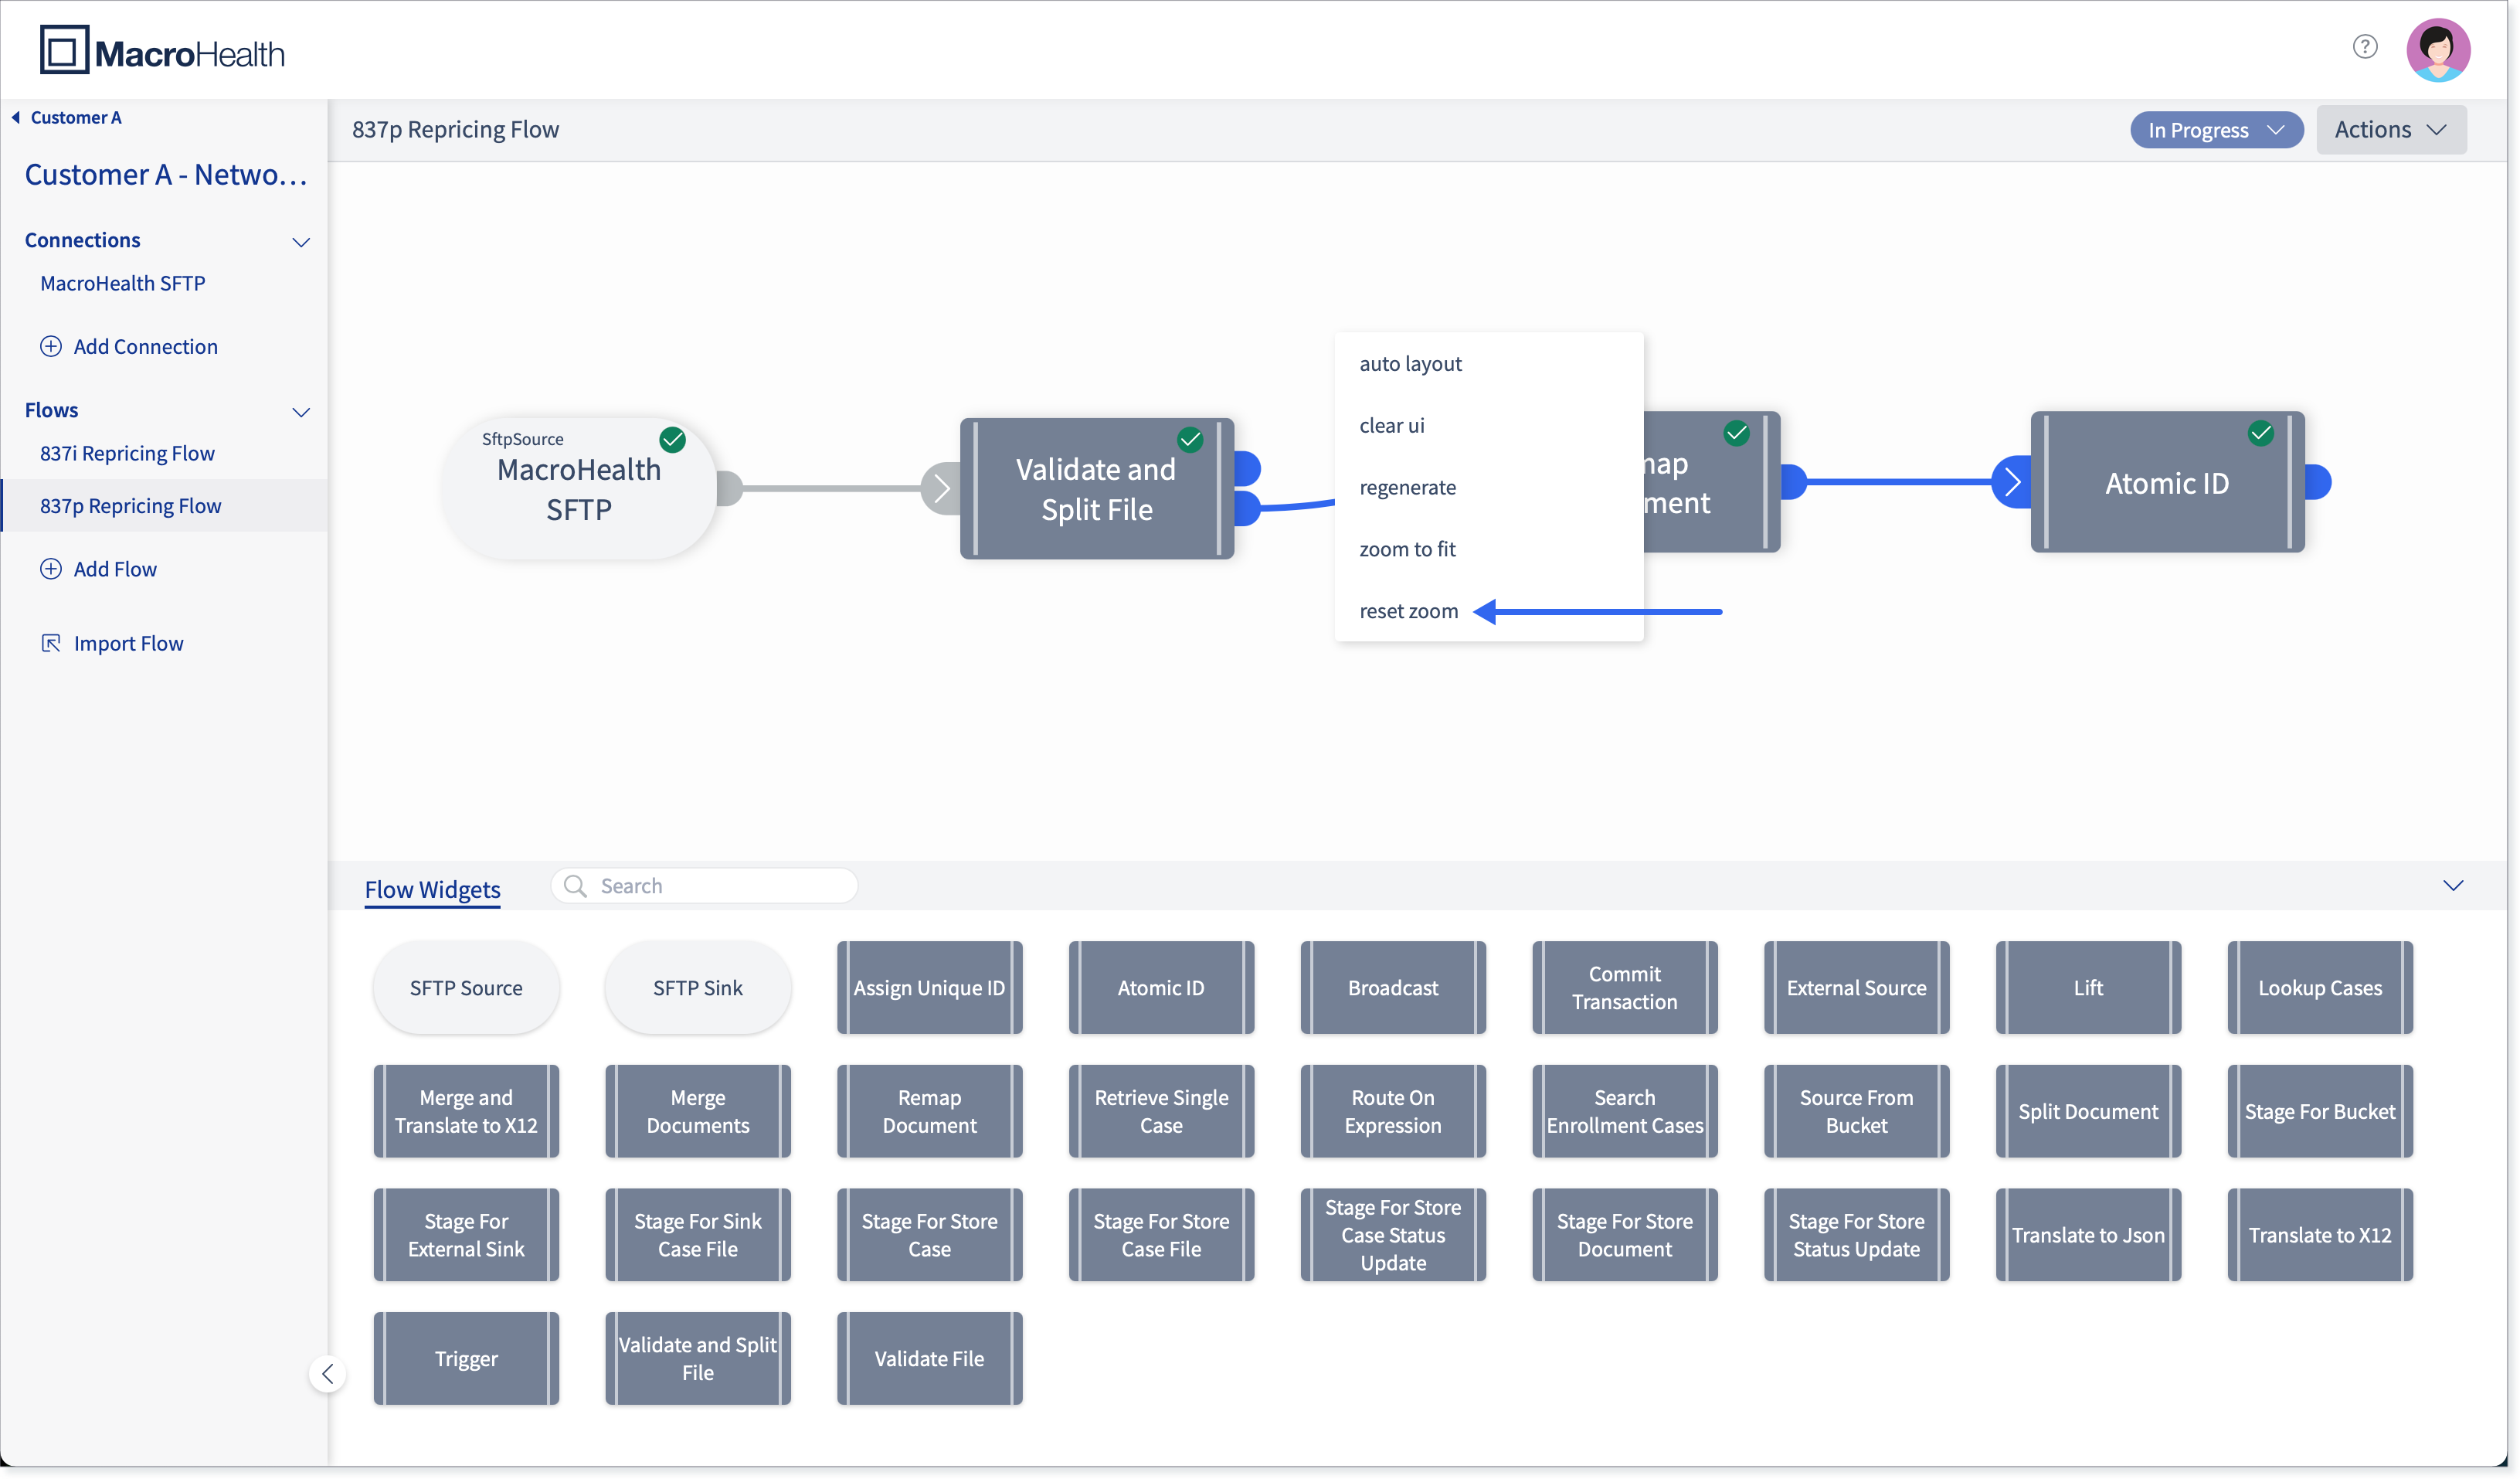

Zoom in / Zoom out
Scrolling with your mouse allows you to zoom in or zoom out on the flow.
Flow Status
In the upper right corner, you can find the Flow Status drop down menu. This lets you know at what stage a of built a flow is at.
In Progress
It is during the In Progress status that a flow is built and configured. When a flow is at this status, it means that it is being worked on. When first adding a flow, it will be at this status.

On Hold
You can select to put a flow on hold if it has not been completed and you are not currently working on it. This prevents it from being edited by you or another user.

Done
You can select Done when a flow is completely built and configured. This lets other users know that the flow has been completed and cannot be edited.

Actions Menu
In the upper right corner, you can find the Actions drop down menu. It allows certain flow editing options and also allows you to deploy a flow once it has been completed.

Rename
The Rename function allows you to rename a flow.
In the left side panel, select the flow that you want to rename and click Rename in the Actions menu.

Edit the name of the flow as required.

Click Rename.

The flow name is updated in the left side panel.

Delete
Caution
Once a flow has been deleted it cannot be recovered, unless it has been exported previously.
In the left side panel, select the flow that you want to delete and click Delete.

You will get a warning letting you know that the flow is currently in use and that once deleted, all flow claim and enrollment traffic will stop. If you want to proceed, click Delete Flow.
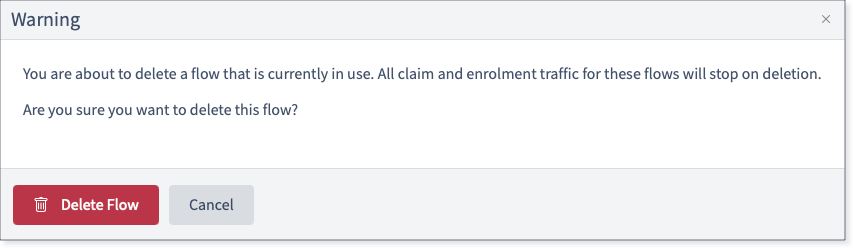
The deleted flow no longer appears in the Flows section of the left side panel.

Deploy
A flow may be deployed when it is completed and is ready to be used to process the data between stakeholders.
In the left side panel, select the flow that you wish to deploy and click Deploy in the Actions menu.

The Status of the flow is changed to Deployed and there is a message displayed to let you know that flow is in Readonly mode.

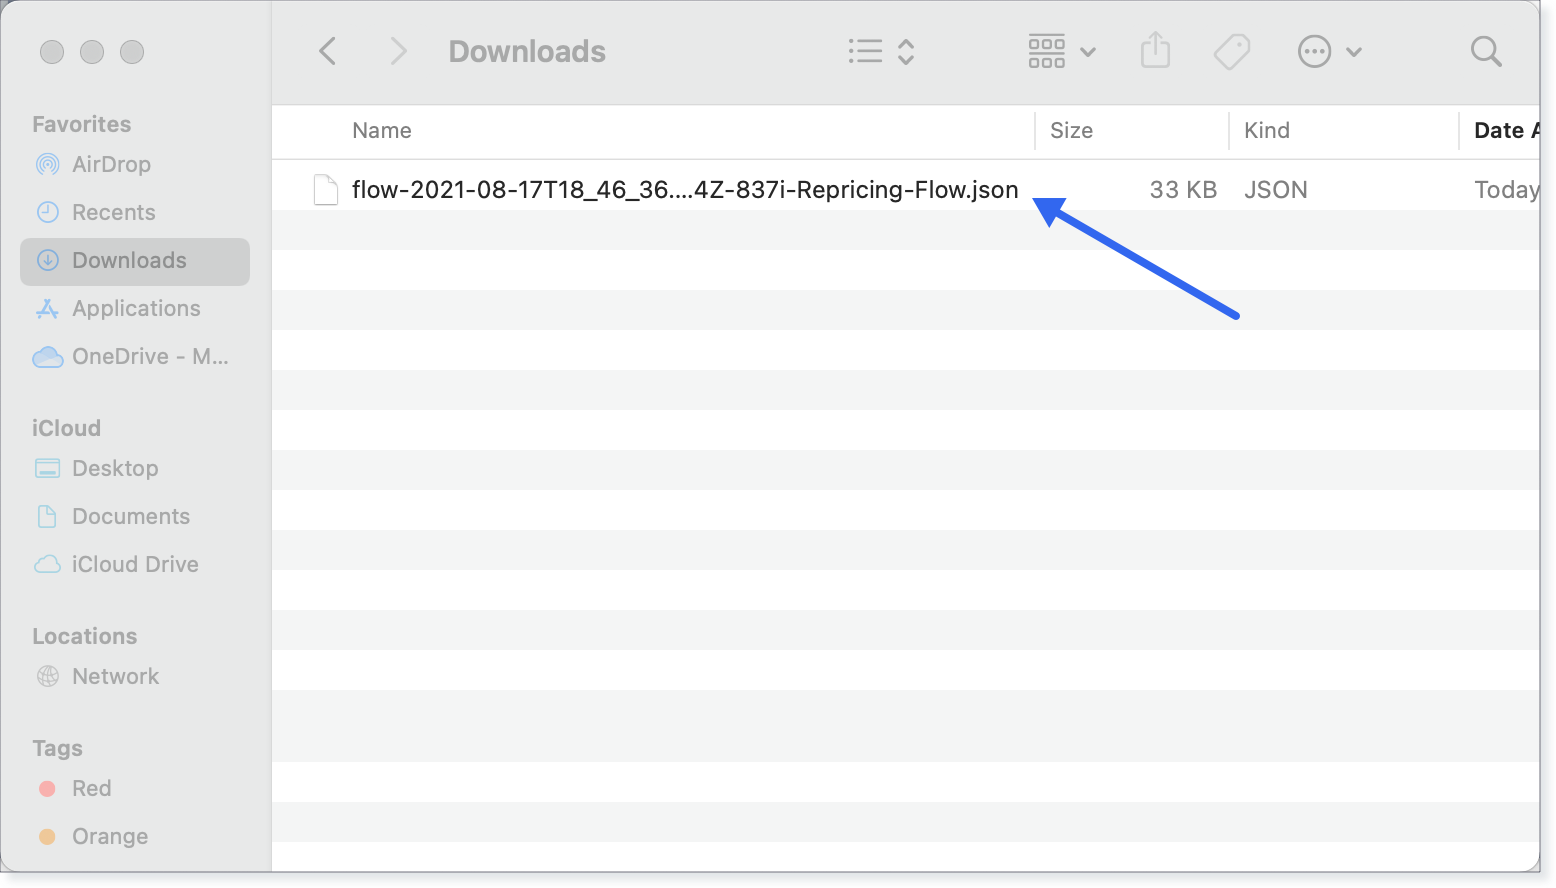
Export
Exporting a flow allows you to save the flow on your computer in order to have the possibility to import it later on.
In the left side panel, select the flow that you want to export and click Export in the Actions menu.

The flow is exported to your Downloads folder, in a .Json format.
Importing a Flow
If a flow has been previously exported with the use of the Export function in the MH Platform, it can be imported using the Import Flow function. (To see how to export a flow, go to Section : “Actions Menu” documentation)
Note
When a flow is exported, the connection credentials are not copied over and therefor will need to be re-entered once the flow has been imported.
Go the Integration for which you want to import a flow.
In the left side panel, click Import Flow.

Retrieve the flow that you want to import.

Select the file and click Upload.

Provide a Flow Name.
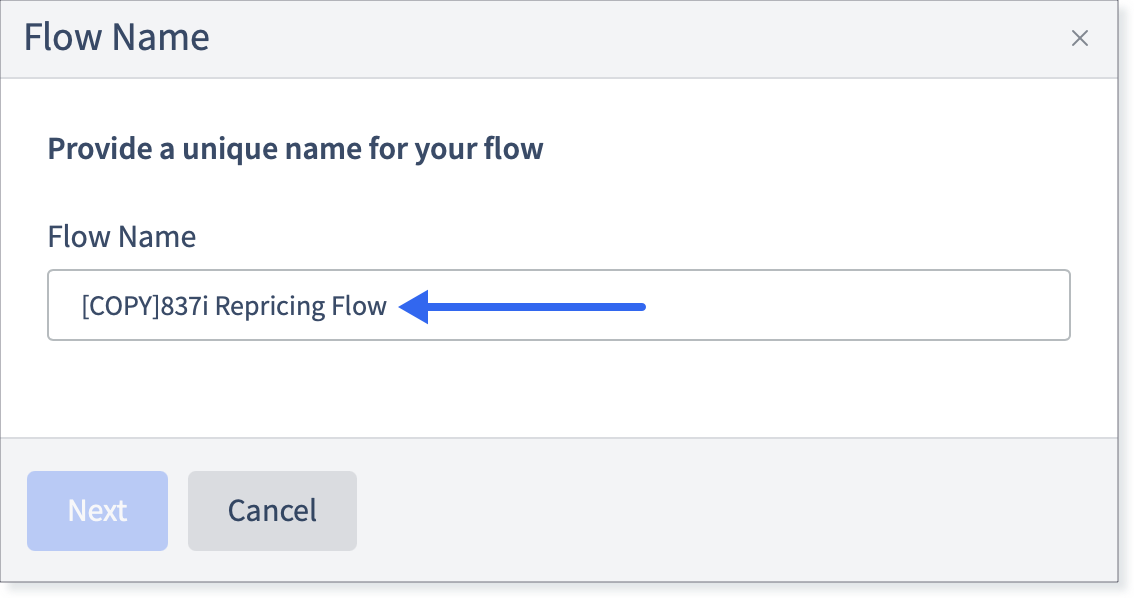
Click Next.

A message is displayed to let the know that the flow is imported successfully and the flow appears in the Flows section of the left side panel.