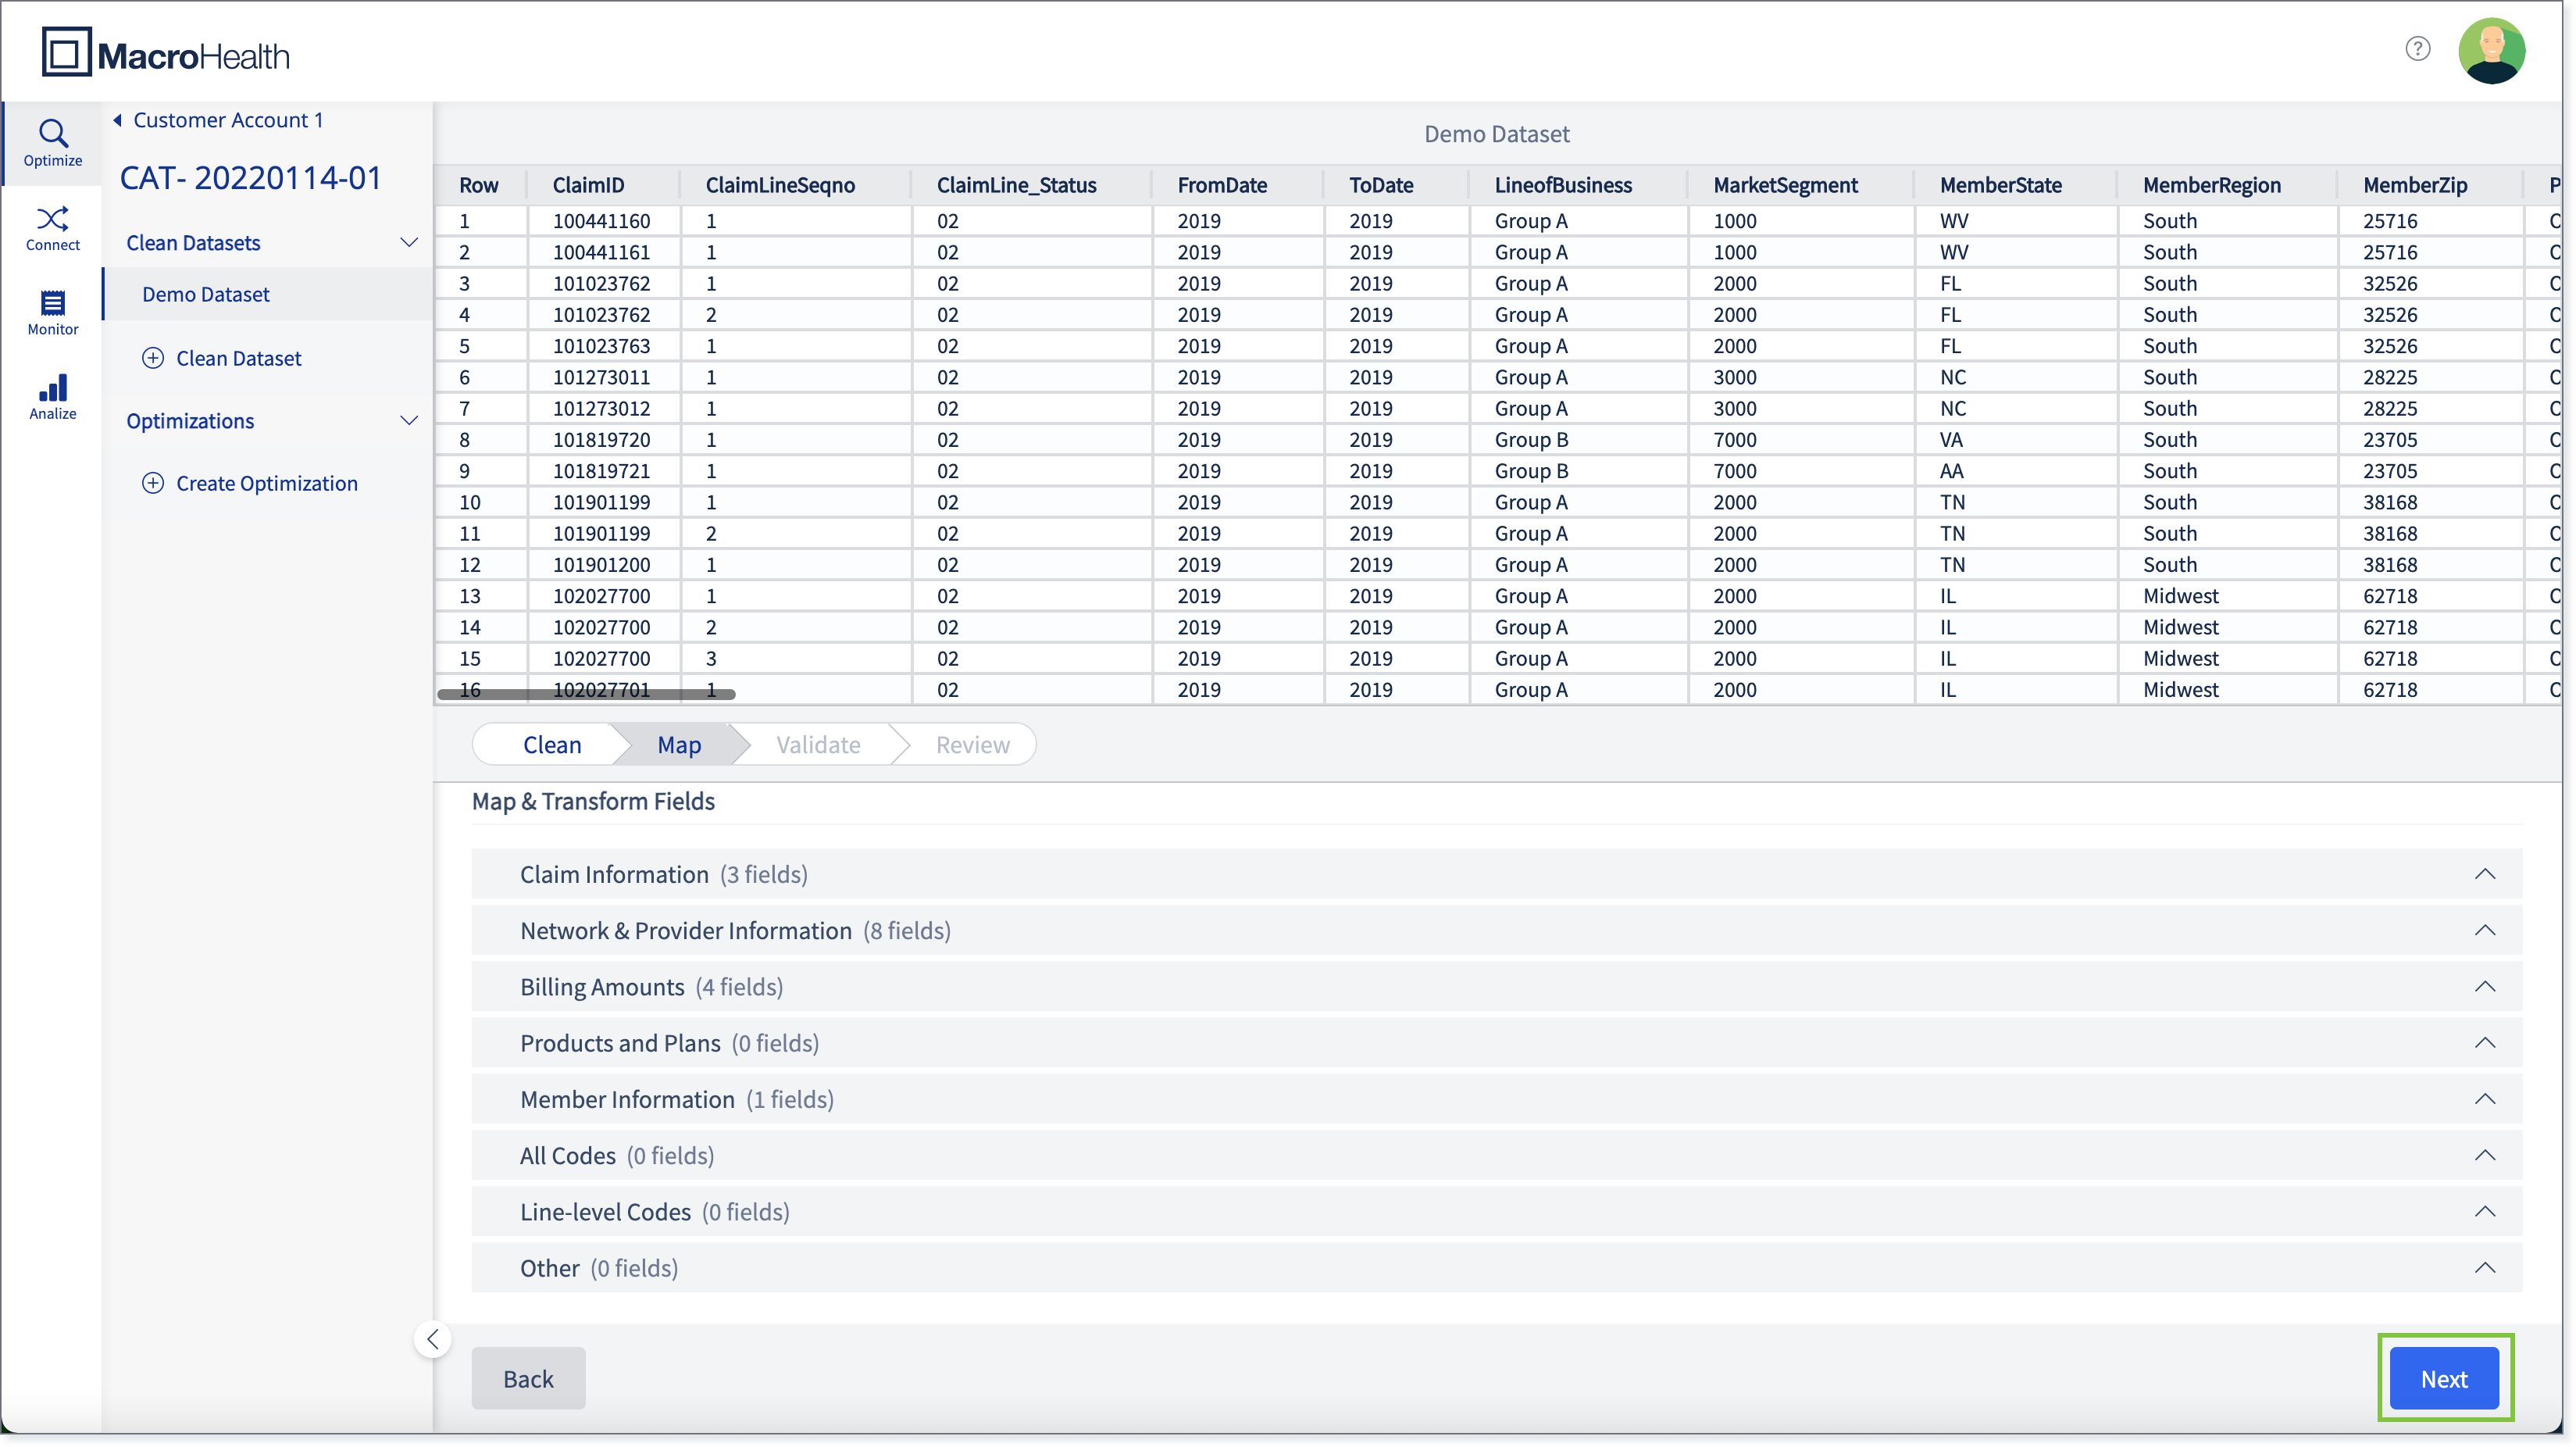
Map
The mapping process is to map the data file columns to what MacroHealth has requested in the data template.
The purpose of this step is so we can run our validation logic to ensure that we have the right values and to exclude any invalid claims.
Tip
Before starting the mapping process, see the preview at the top which allows viewing the data and columns to see if it complies with what MacroHealth has requested.
Map & Transform Fields
The mapping process is divided into sections and the fields represent the column header in the template. The fields may vary depending on the template.
Note
The following fields are the minimum fields that need to be mapped in order to validate the file. If the file does not contain these fields, the user should request the information from the prospect.
Prospect
Claim Information
Claim ID
Claim Type
UB Type of Bill
Network & Provider Information
Provider Network Status
Provider Tax ID
Provider Name
Provider Address
Provider City
Provider State
Provider ZIP Code
NPI
Billing Amounts
Billed Charges
Denied Amount
Eligible Charges
Discount Amount
Member Information
Member ZIP Code
Network
Claim Information
MH Claim ID
Network & Provider Information
Provider Network Status
Billing Amounts
Network Allowed Amount
Network Discount Amount
Out-of-Network
Claim Information
MH Claim ID
Repricing Methodology
Medicare Allowed Amount
Medicare Discount Amount
UCR75 Allowed Amount
UCR75 Discount Amount
Logo Required Contract Allowed Amount
Logo Required Contract Discount Amount
No Logo Contract Allowed Amount
No Logo Contract Discount Amount
Negotiated Allowed Amount
Negotiated Discount Amount
Proprietary Allowed Amount
Proprietary Discount Amount
Proprietary 2 Allowed Amount
Proprietary 2 Discount Amount
Proprietary 3 Allowed Amount
Proprietary 3 Discount Amount
Specifying the Mapping
The values on the left correspond to the name of the column headers in the MacroHealth template that was sent to the prospect and the fields on the right correspond to the name of the column headers in the data file that the prospect uploaded, which can be viewed in the preview at the top.

Tip
Using square brackets [ and ] while searching a field will display the ones available.
To specify the mapping, use the auto-complete feature by writing [ and then a part of the prospect's data file column header. The available options will appear as you type.

Select the column header that is equivalent to the MacroHealth column header.

Fill in all the fields that are required in each section. The fields that are already displayed in the Map & Transform Fields sections are all required and must be filled in. When referencing columns from the file/preview, the column names must be enclosed with square brackets [ ]. The fields will appear with a green check when they are filled in appropriately and the Next button will become enabled.

For the Billing Amounts section, it is possible to use basic arithmetics (+, -, *, and /) to calculate the equivalent to the MacroHealth column header. For example, if MacroHealth requires the Discount Amount and the prospect file does not include that column, but it can be calculated from two or more other columns, use the prospect's column headers to achieve the equivalent to the MacroHealth column.
Tip
It is possible to exclude claims using the optional field under Billing Amount.
COB amount: if the value is non-zero, the claim is excluded
Denied claims: if the Eligible Charges is equal to zero and/or if the Billed Charges is equal to the Denied Amount, the claim is excluded
Billed Charges: if the Billed Charges is equal to zero, the claim is excluded

If no other fields need to be added, click Next.

Add Optional Field
Although many fields are required, it is possible to add other fields to the mapping, which may be useful for Network Optimization and for Export to Networks.
Select the required section and click Add Optional Field.

Select a MacroHealth column header from the dropdown.

Using the square brackets, type in the prospect's column header.

If the information is valid, the field will be marked with green check.

Create New Field
This function is useful to map anything that is not in the MacroHealth template but that may be useful for Network Optimization.
Select the required section and click Create New Field.

Enter the MacroHealth column header.

Using the square brackets, select the prospect's column header.

If the information is valid, the field will be marked with green check.

Now that you have completed the Map Process, you can proceed to Validate.
Copying a Mapping
In order to allow the reuse of a mapping, it is possible to copy a mapping from on session to another, when they are of similar type. (Prospect, Network, or OON)
Open the data session form which you want to copy the mapping.
Click the Copy Mapping function.
From the drop-down, selet the Dataset where you want to copy the mapping.
Click Apply Mapping.
The mapping will be copied over to the other session.