Adding a Crosswalk
Crosswalks allow MacroHealth to teach the system how to translate or augment the data between the Payer and the Network. It uses a table of paired input and output values to map the transformations, applicable to a specific set of fields.
Crosswalk Tables
MacroHealth will receive a document from the Payer or the Network containing the information on how the data needs to be transformed in the form of a table. The accepted file formats are a .csv file (Comma Separated Values) or a delimited pipe separated file (|) that has been created using a text editor.
Example of table (.csv):

Example of delimited file (.csv):

The data can be transformed from right to left or vice versa, depending on how the crosswalk is configured. Typically, one column defines the Network or Payer codes and one columns define how the data must be transformed for the other party. Other columns may be added for additional information.
Adding a Crosswalk
Select the Customer for which you are adding a Crosswalk.

Select the Integration for which you are adding a Crosswalk.

Click Add Crosswalk.

Enter the Crosswalk Name. The name should be descriptive containing the information relating to the group such as the Payer-Network pair. (E.g. Payer - Network Group Crosswalk)
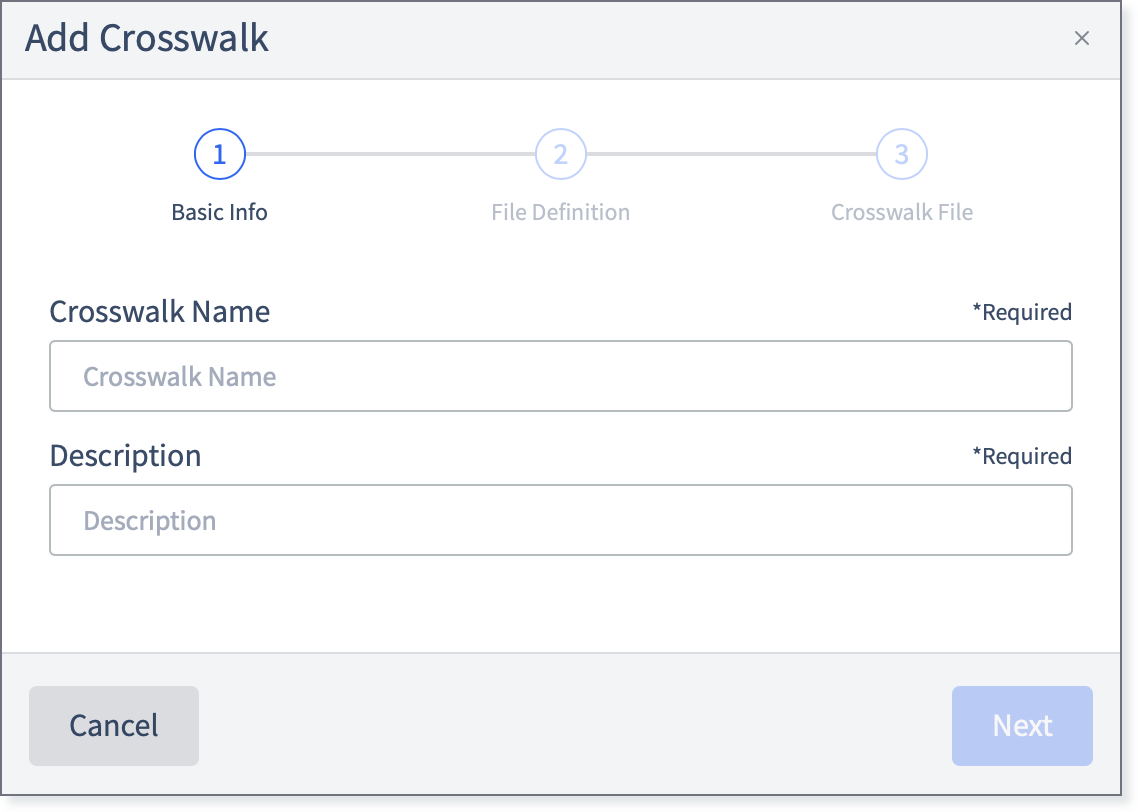
Click Next.

Enter the File Definition in JSON format.

Click Next.

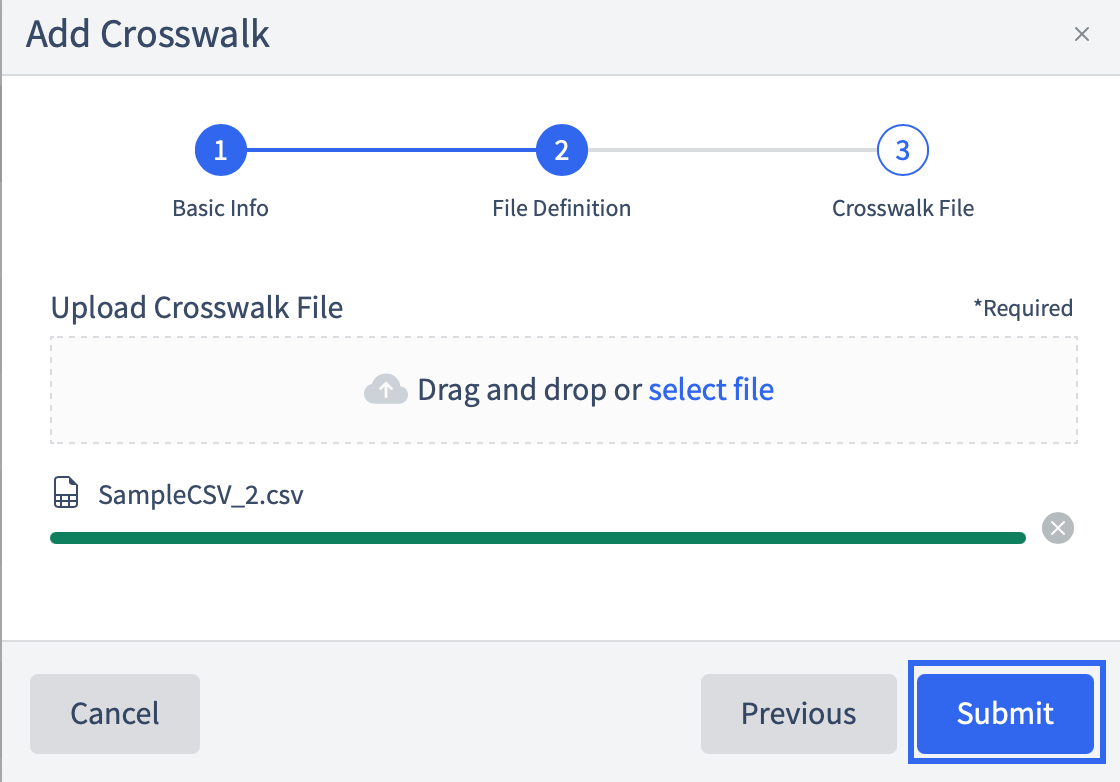
Drag and drop or retrieve the crosswalk .csv file.

Click Submit.

A message will appear for a short period of time letting you know that the Crosswalk is ready to use. You will now be on the Crosswalk dashboard.


Crosswalk Version History
The MacroHealth Platform keeps all the version history of crosswalks. This allows downloading a specific version and if needed applying changes to it.
To view the Crosswalk version for a specific integration:
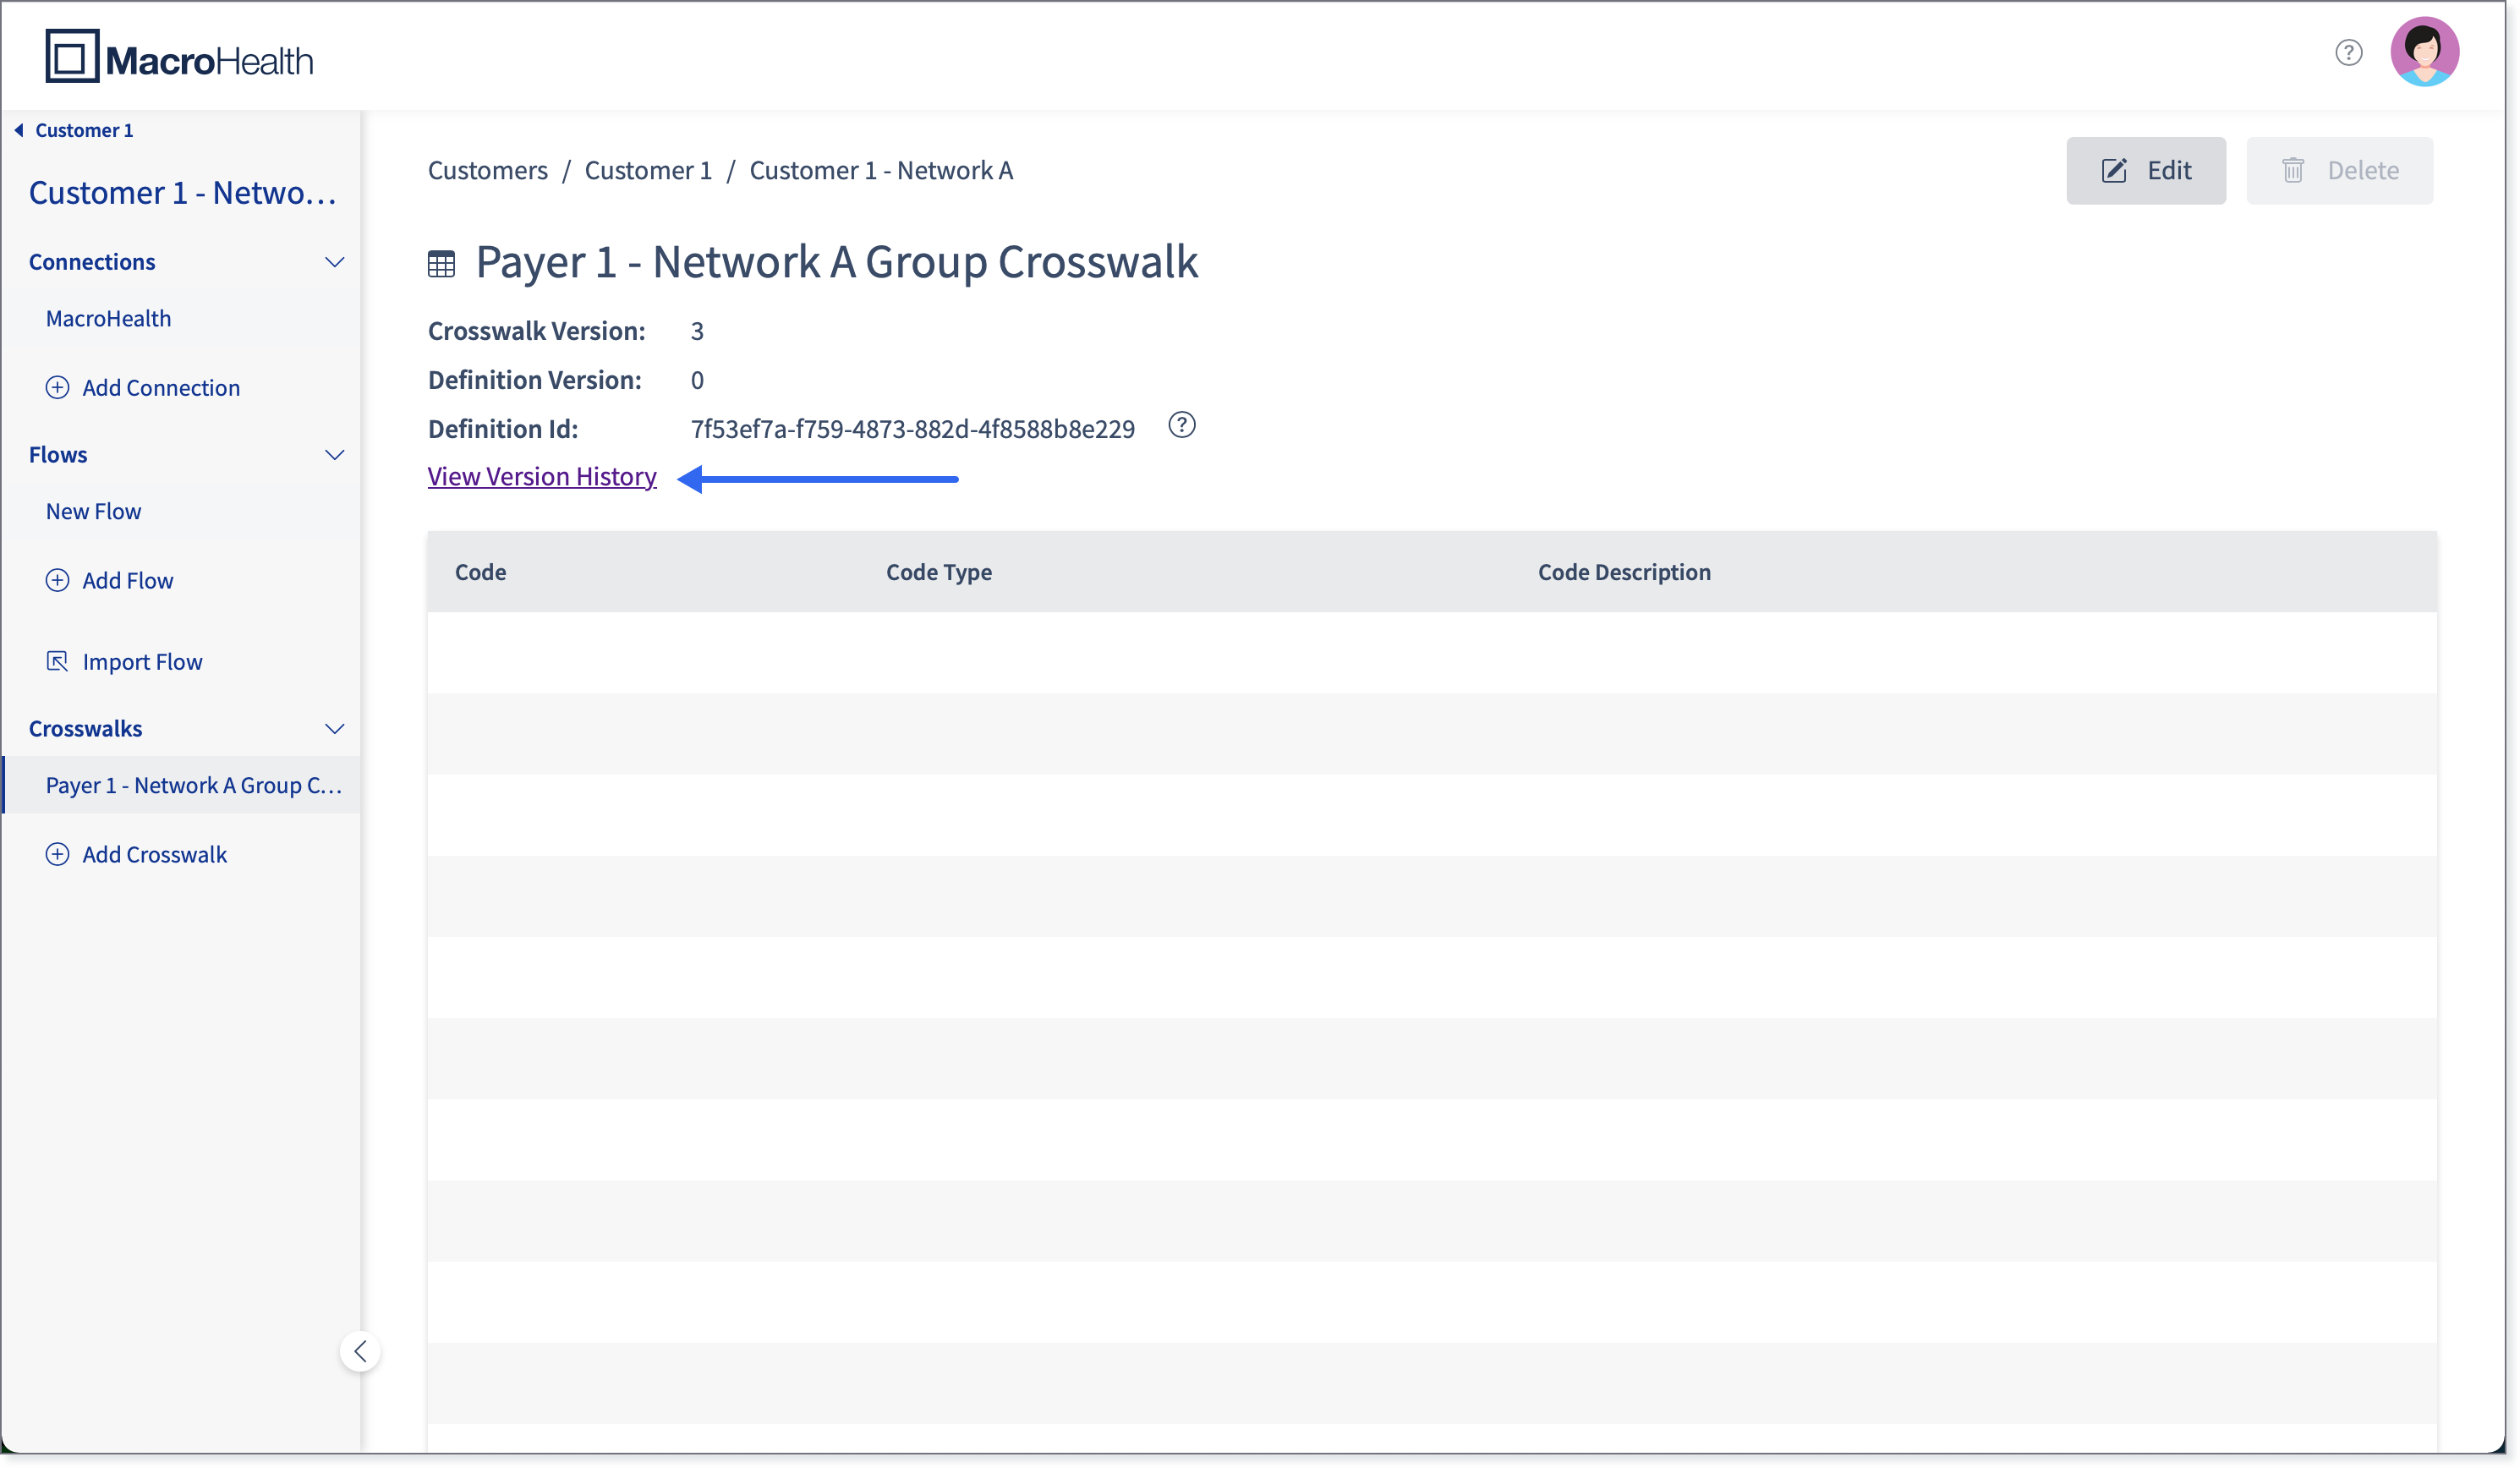
Select the specific crosswalk in the Crosswalks section of the left side panel, or alternatively in the Crosswalks menu.

If selecting the Crosswalks menu, you will view the list of crosswalks, and if selecting a specific crosswalk in the left side panel, you will land on the page for that specific crosswalk.


Click View Version History.
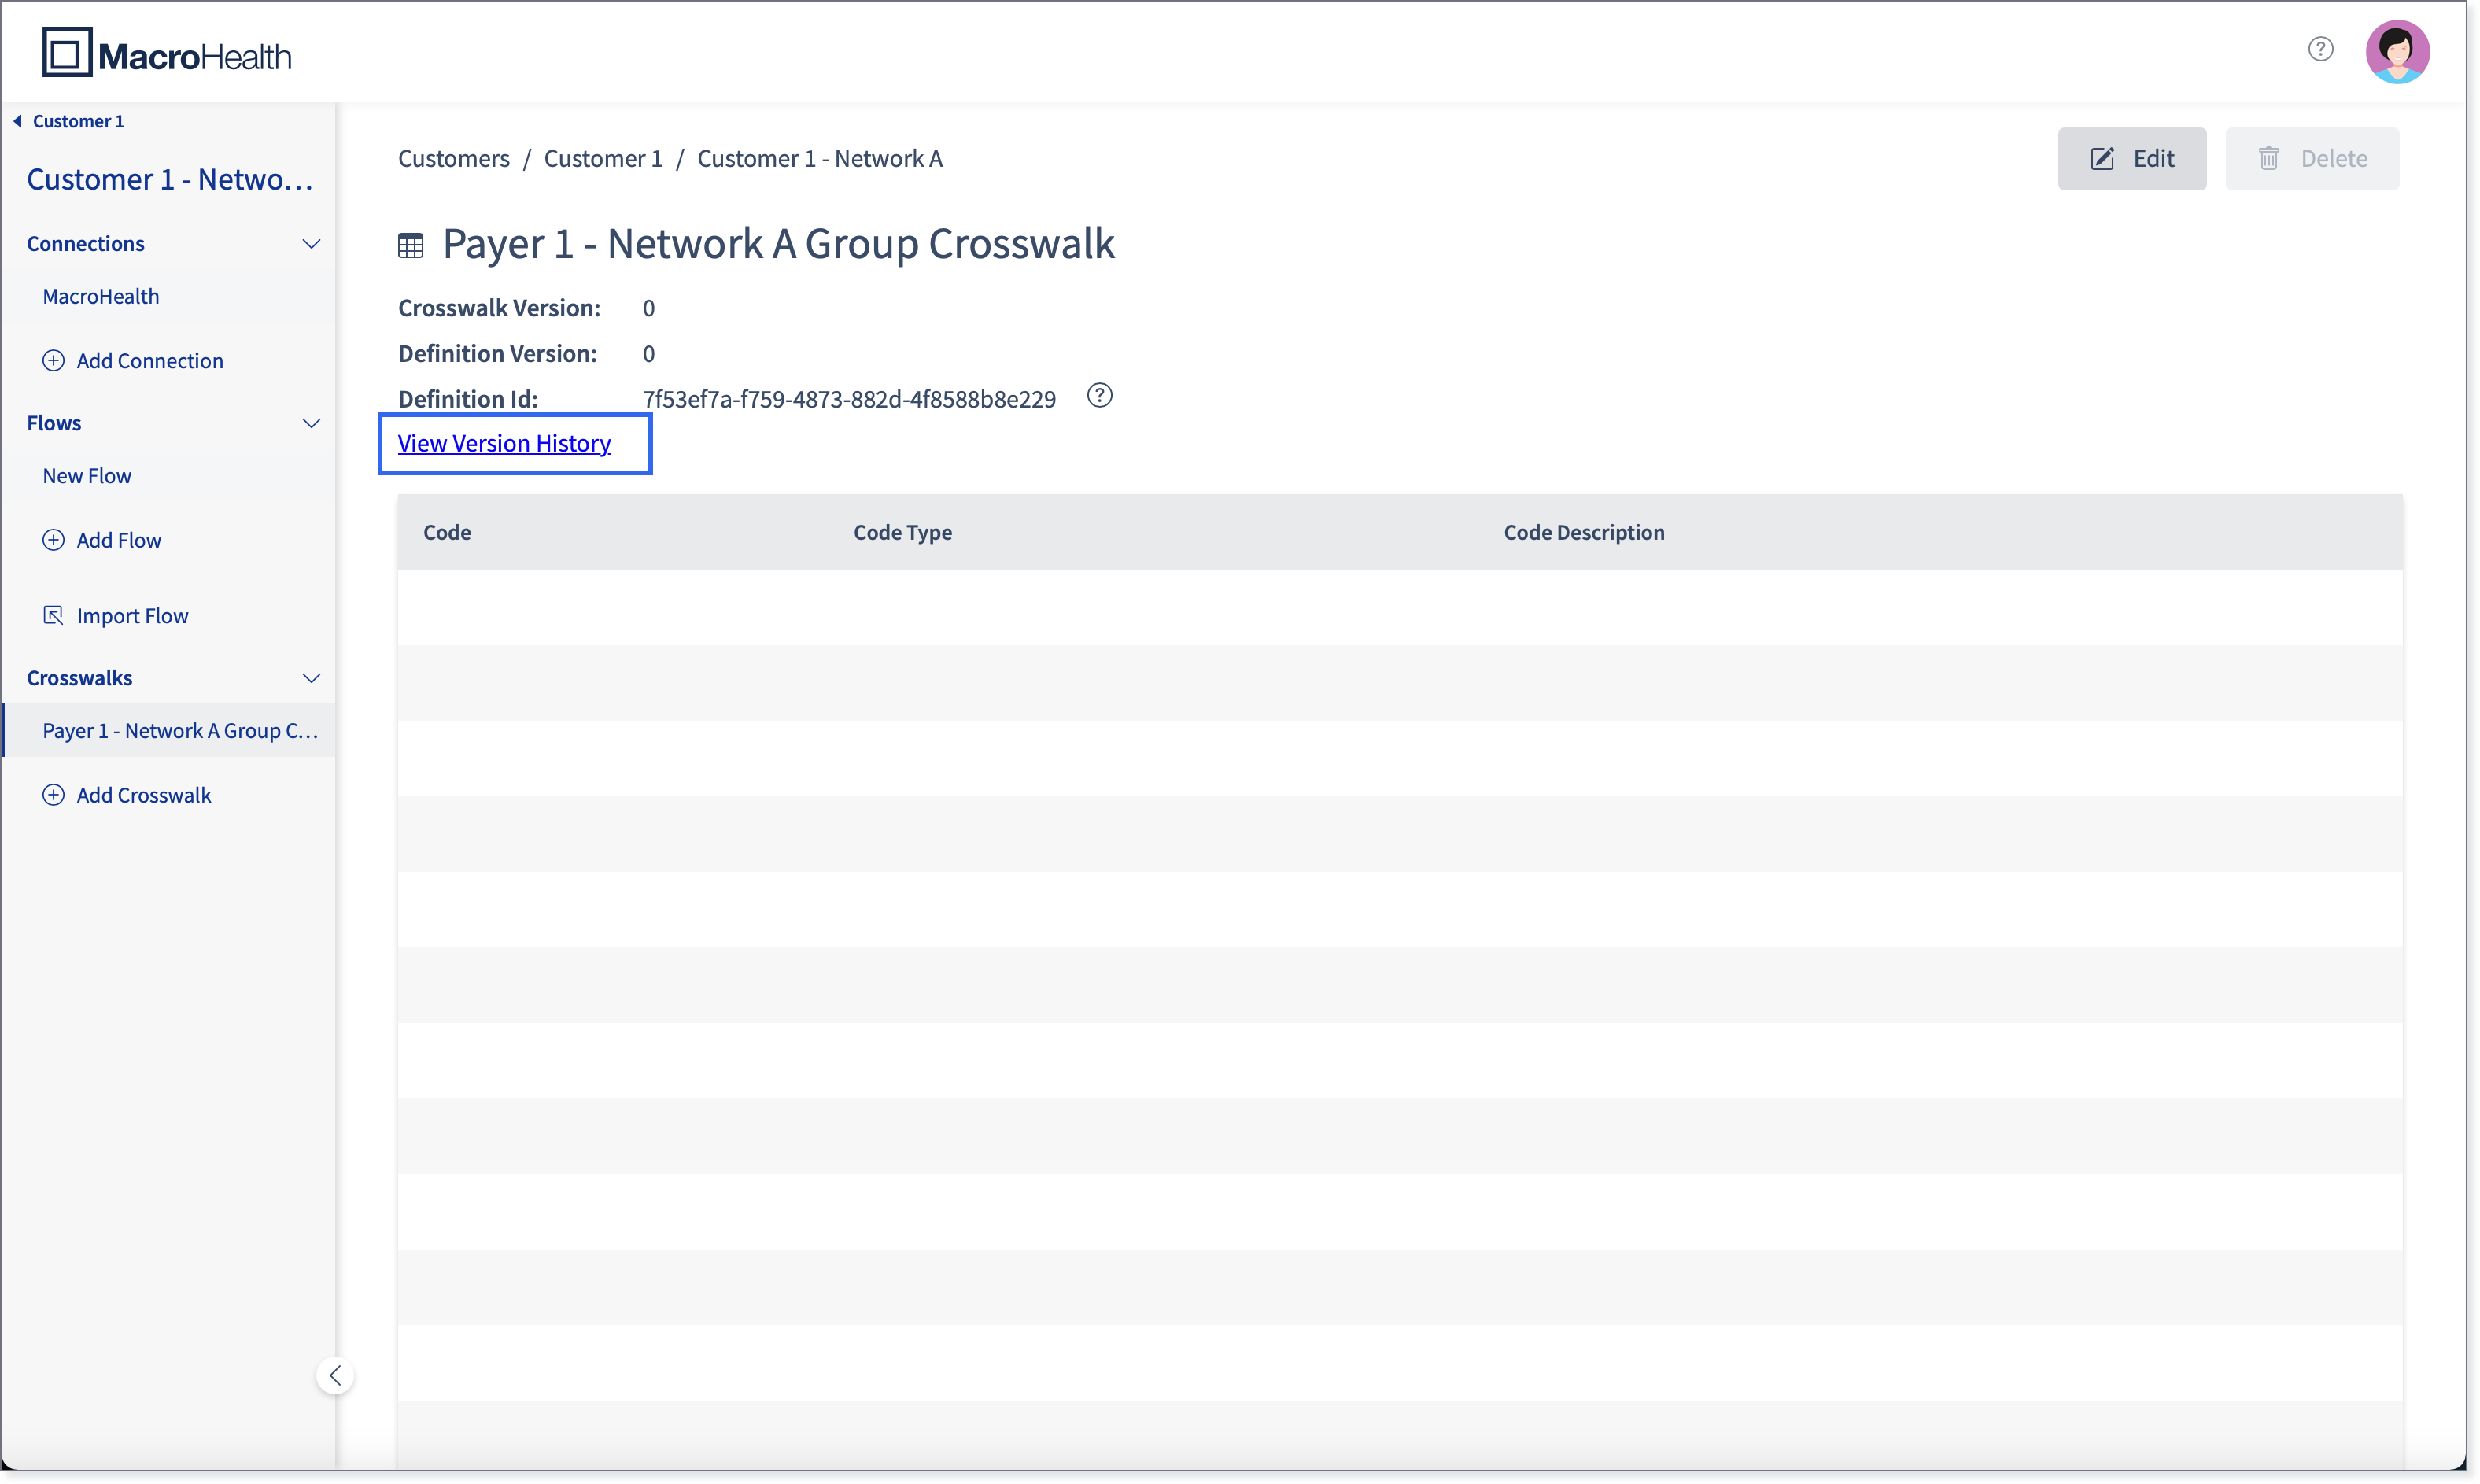
The Version History for the selected crosswalk will be displayed.
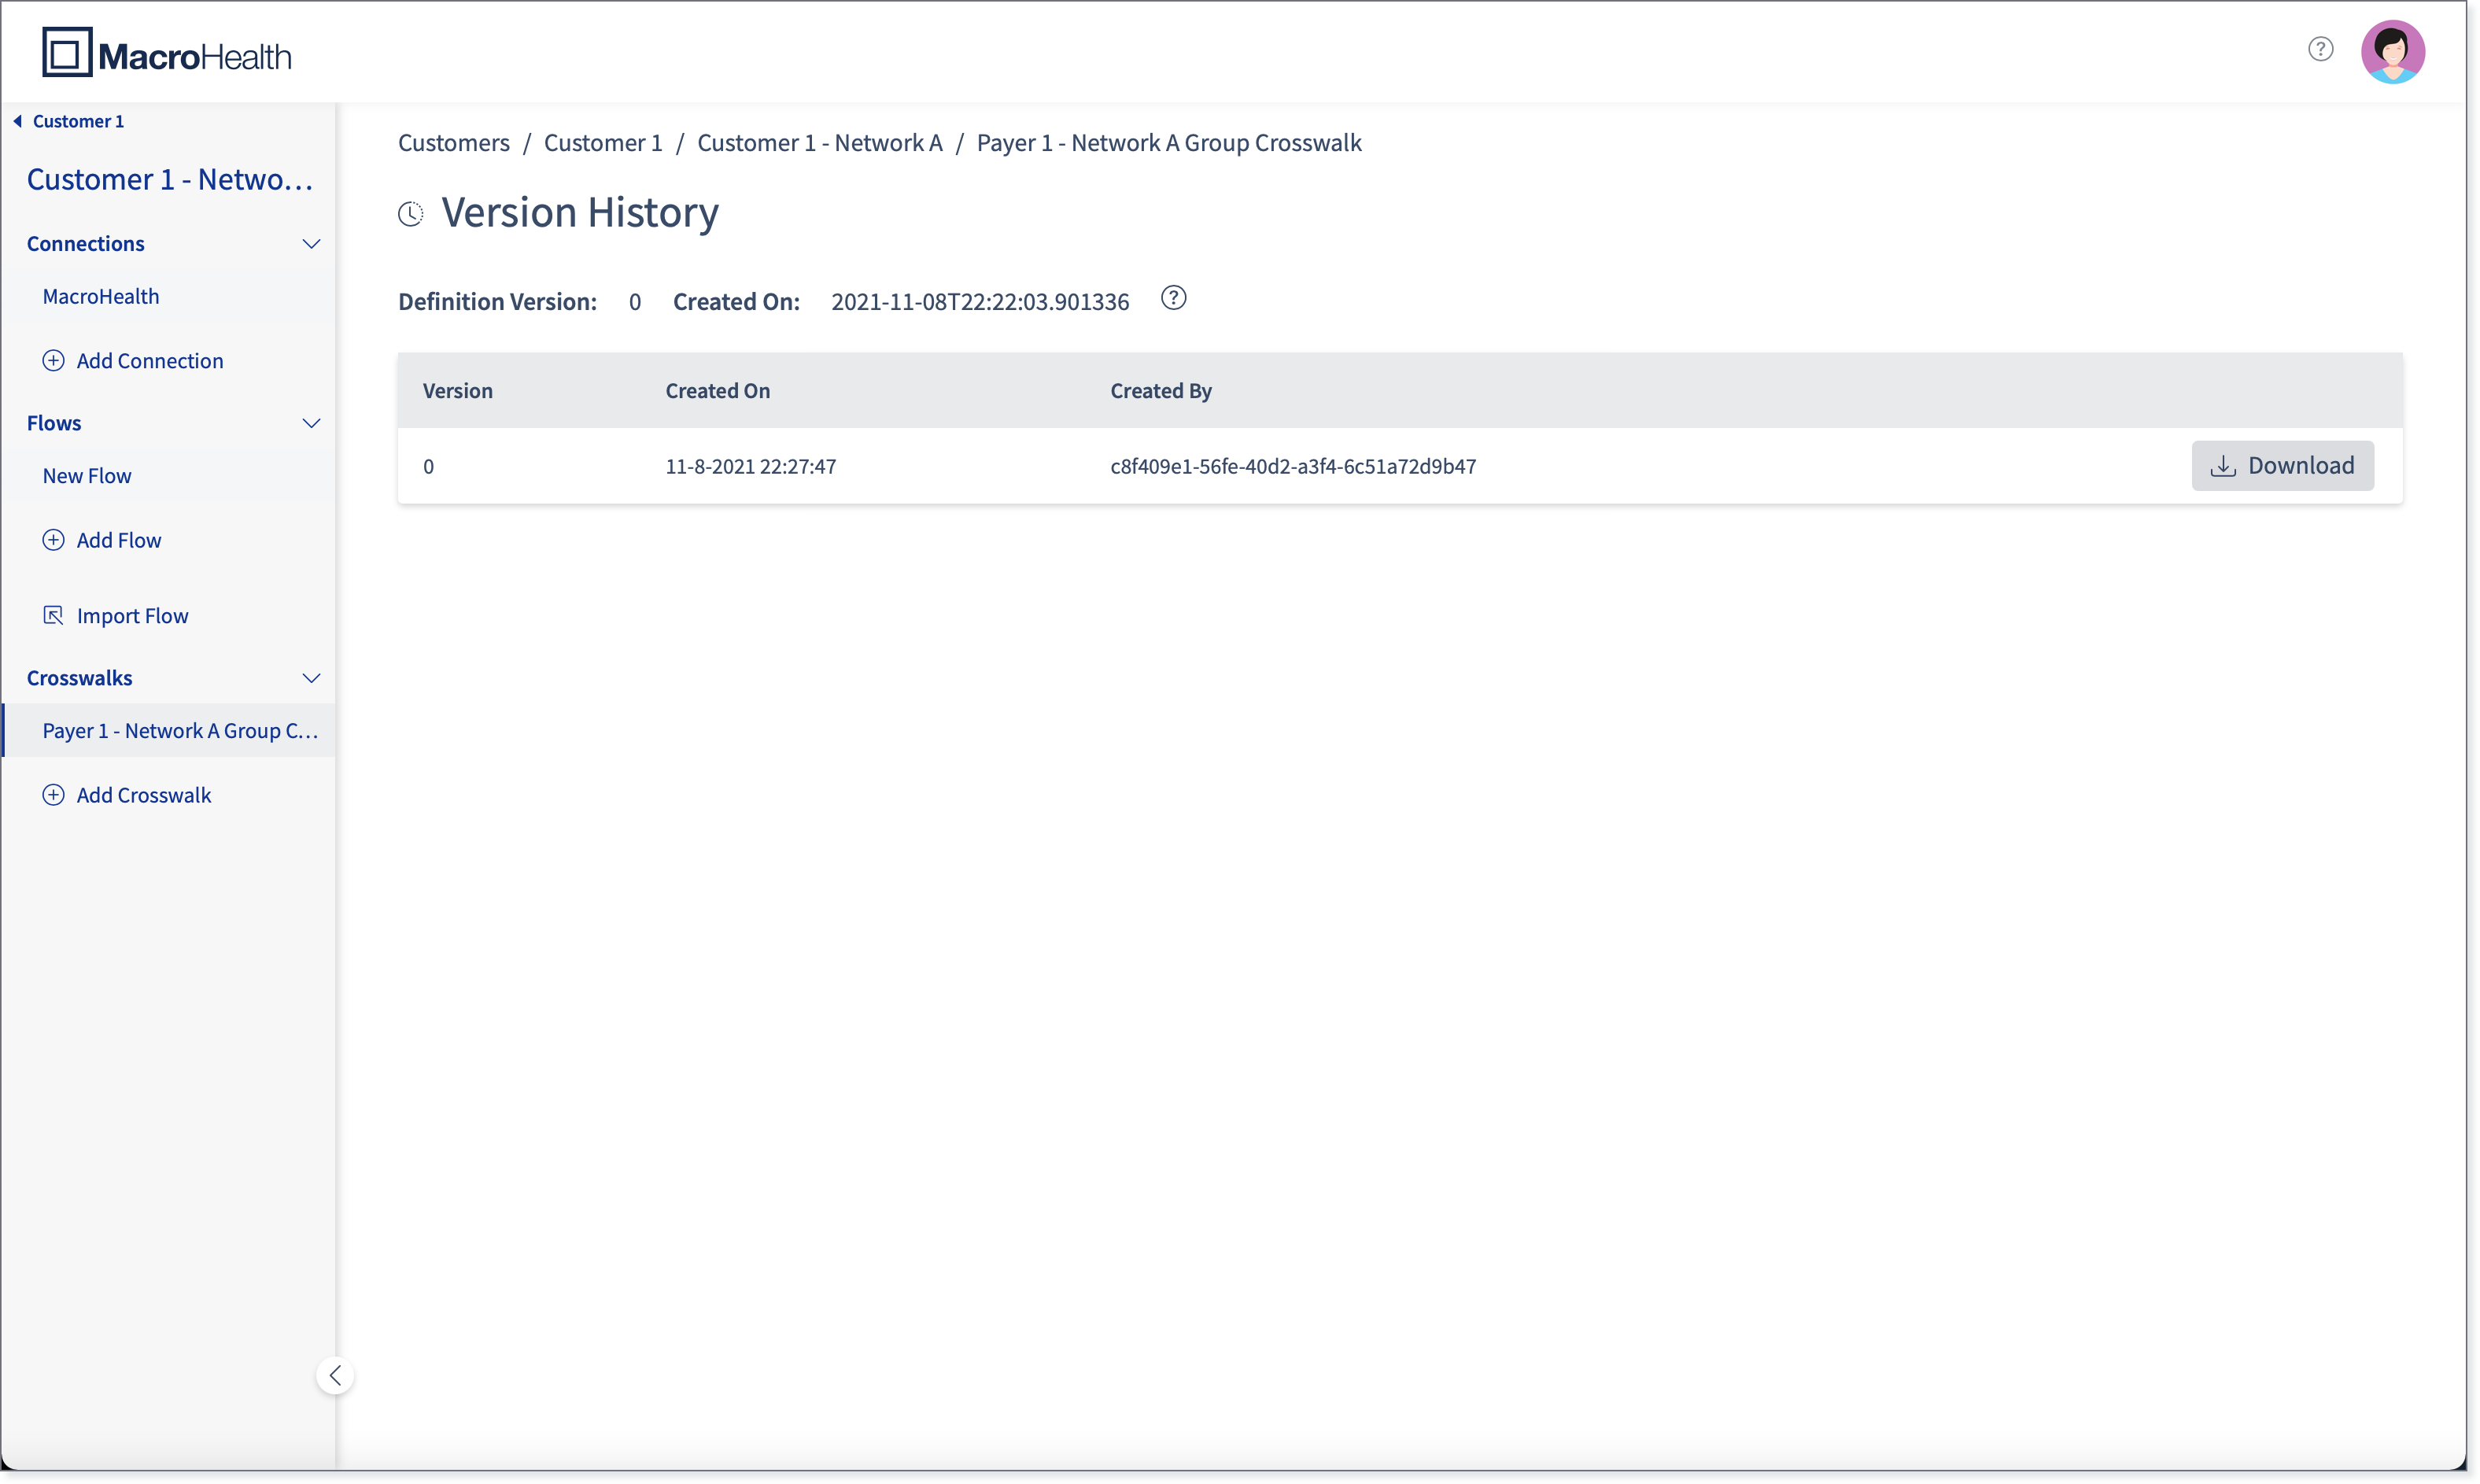
Tip
While in the Version History window, hovering over the question mark icon allows viewing the JSON object associated to that version.

Using the Crosswalk Widgets
Once a crosswalk has been added into the system, it can be integrated into a flow using either the Invoke Crosswalk or the Lock Crosswalk widgets.
Important
The Lock Crosswalk operation must be inserted into a flow which contains the Invoke Crosswalk operation in order for the flow to be deployed.
Invoke Crosswalk
The Invoke Crosswalk operation is used to apply crosswalk mappings from the crosswalk file that was previously uploaded using the Add Crosswalk function. It is typically inserted before or after the Remap Document widget in order to perform a mapping of the values from the input fields to the output fields. For more information on the Invoke Crosswalk widget configuration, see Section : “Invoke Crosswalk”.

FileId: Enter the Definition Id.

fileEntityType: The default value is "crosswalk" and can be left as is.
crosswalkVersionsDocuments: Enter the Definition Version number.

crosswalkInputMap: This field is a JSON object to link a crosswalk column name to a shovel expression in order to tell how to extract the field from the Context Document, which will be returned as a list of string values.
Example:
{
  "ZipCode" : "atFieldRead(....)"
}
crosswalkOuputMap: This field is a JSON object that links a crosswalk column name to another JSON object containing several settings written in bullet form, with the following hierarchy:
CrosswalkColumnName1
fieldRef: required
default: (optional)
combinedExpr: (optional)
CrosswalkColumnName2
fieldId: required
default: (optional)
combineExpr: (optional)
Example:
{
  "CrosswalkColumnName1": {
    "fieldRef": "<fieldReference>",
    "default": "foo",
    "combineExpr": "<shovelExpression>"
  }
}
Lock Crosswalks
The Lock Crosswalks operation is used to apply the same crosswalk mapping to all records for the same incoming file. It also allows you to upload a new crosswalk when a flow has been already deployed. It is typically inserted after the "SFTP Source" or "Source From Bucket" widgets.
The Lock Crosswalk operation finds the most recent version of the crosswalk that is being used in the flow and gets the current data version of all crosswalks used in the flow. For more information on the Lock Crosswalks widget configuration, see Section : “Lock Crosswalks”.
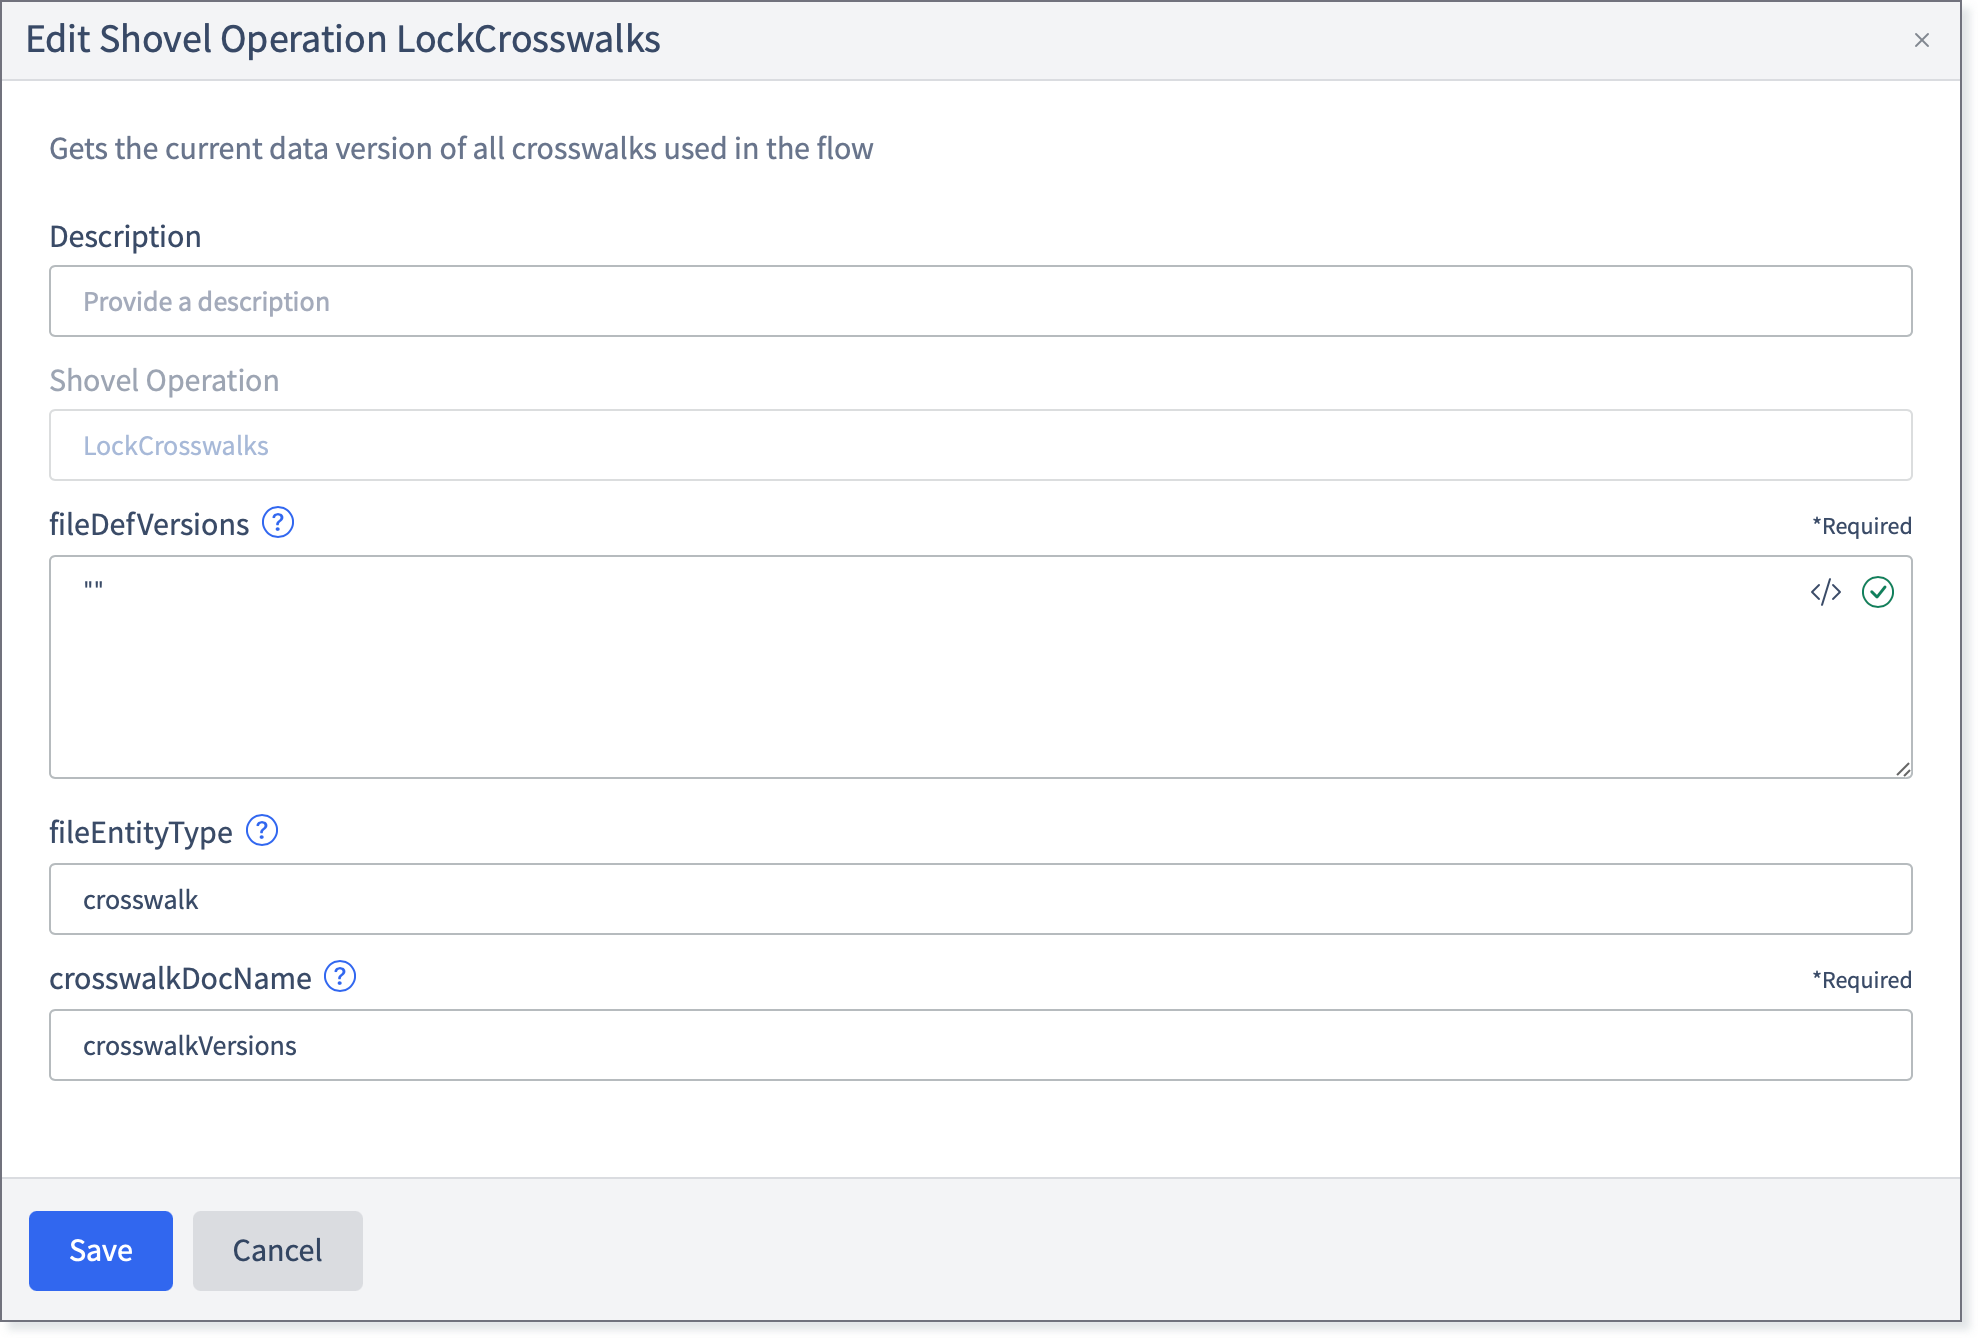
fileDefVersions: This field is a JSON object mapping the crosswalkId to the schema version used for that crosswalk in the flow.
Example:
{
  "<crosswalkId>": <definition Version>
}
fileEntityType: The default value is "crosswalk" and can be left as is.
crosswalkDocName: This is the name of the document, which will be created by the output of this operation, that will be saved in the Context Document.
Editing a Crosswalk
The Edit function is mainly used to apply edits to the .csv file and re-uplaod it, for instance in the circumstance where you need to add a column to the .csv file.
Navigate to the crosswalk for which you need to apply changes and click Edit.
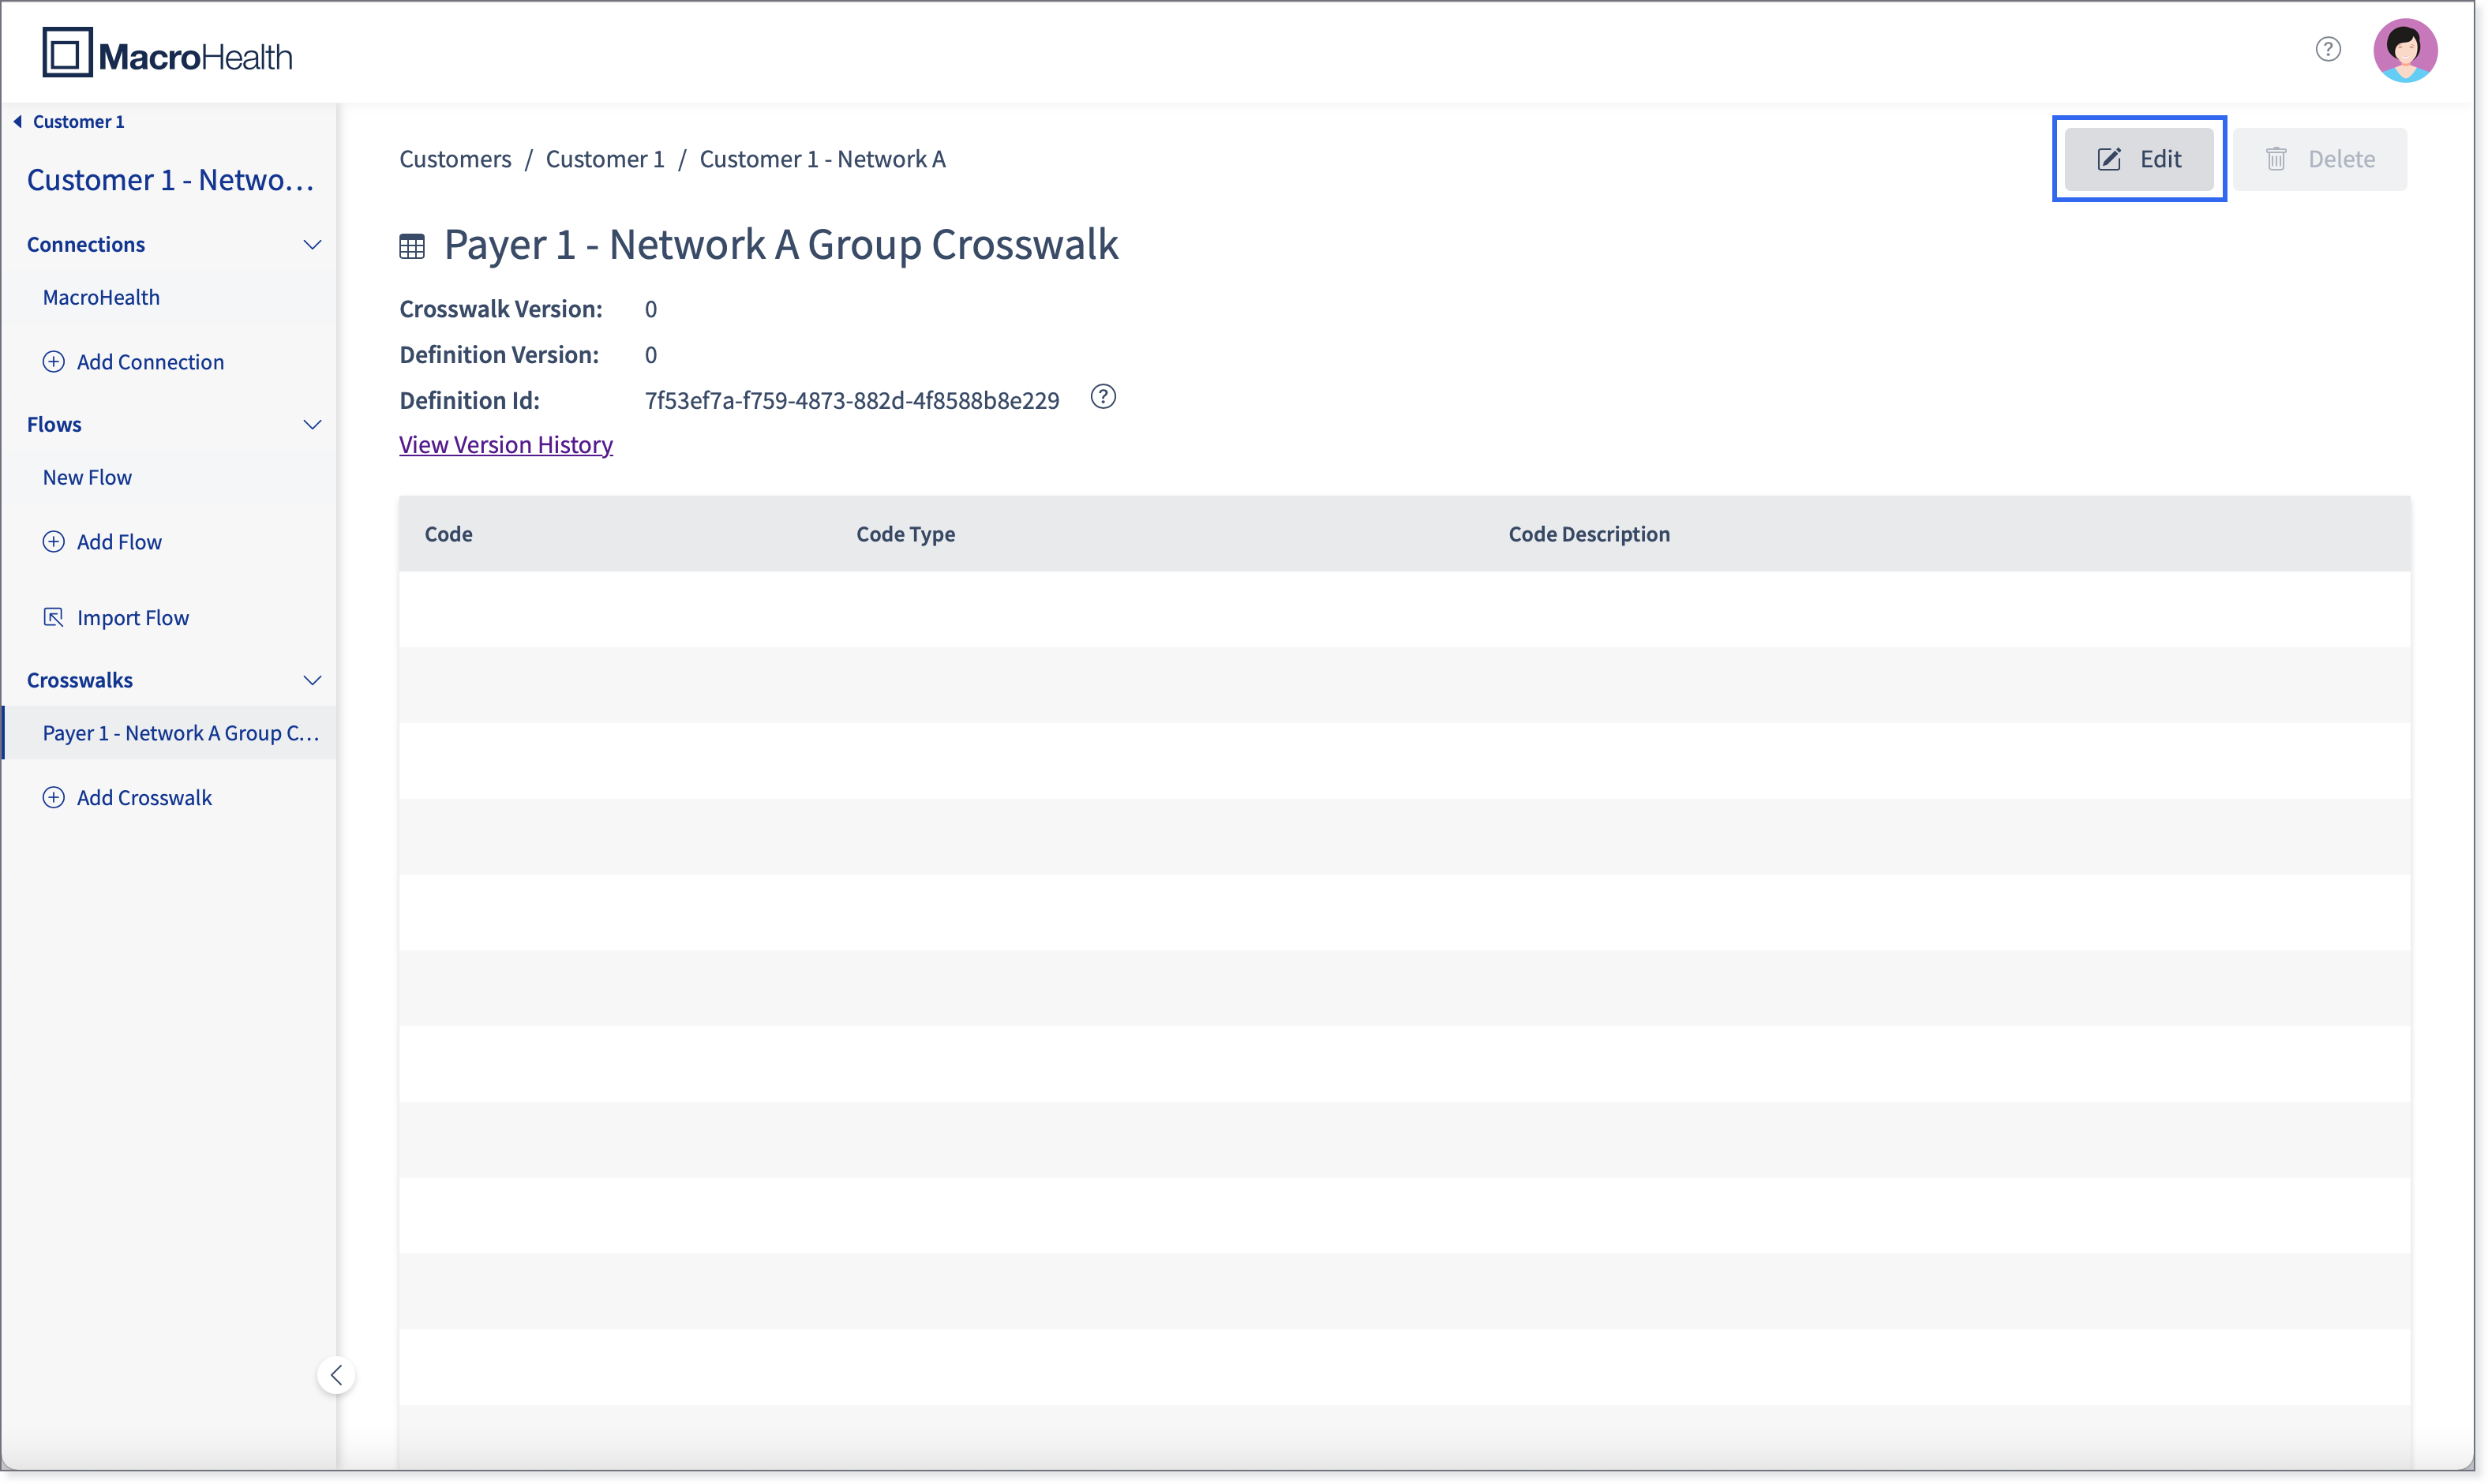
Drag and drop the new .cvs file.

Click Submit.
A message will appear for a short period of time letting you know that the Crosswalk is ready to use. The Crosswalk Version number will be updated to the current number of crosswalk versions.


Downloading a Crosswalk Version
The Platform allows downloading a crosswalk version from the Version History in order to edit it or to save it for future use.
Select the Crosswalk for which you want the download one of the version histories.

Click View Version History.
Click Download next to the version that you want to save.

The crosswalk file will be into your downloads folder.
